My tip today is don't change something that's not broken!
I am disliking my new website design a lot, not least because the new format seems to squish and distort my images. The link colours are the same as the rest of the text, making them harder to spot. For my own organised satisfaction, I think I'm better off going back to a three-column layout.
So, expect a few more days of website maintenance in the near future. I just can't bring myself to do it straight away. I'm not a tech-head and it usually takes me sooooo long. And I always end up losing something in the switch. Bleh!
Showing posts with label tips. Show all posts
Showing posts with label tips. Show all posts
Tuesday, 26 October 2010
chatter,
Project 365,
tips
0
comments
Tuesday Tip: Don't Give Up on {Project 365}
Pffftt!! Yep, that’s what’d I’m saying too. We are now into our 43rd week of the year, and the last {Project 365} layout I can remember creating was back in Week 27. So, ahh, yeah, that’s a bit of catching up to do.
But, that’s ok. I can do it. And so can you. So you may have fallen behind a little lately. I know I’ve got a great excuse for doing so. {You probably do too}. I’ve been designing up a storm! Trying to stockpile a heap of kits and digital scrapping goodies for when I launch into the digital design world come 2011. I’m gonna be famous baby! (well, I want to sell something at least!) And I’ve been doing a hell of a lot of layouts for my CT designers.
Try this for size: 56 layouts for Mscraps.com in the month of September. And that’s not the only Creative Team I’m on, you with me? But it’s just that there are sooooo many great products out there that beg me to download them and give them a try. Honestly, I lie awake at night thinking about all these page ideas and special techniques that I could try out on the next layout. And then, when it comes to 4:30am and I STILL can’t get to sleep, I get up, make myself a cuppa and get onto the computer pronto – I need to release these creative endorphins! PRONTO!
So I’ve taken to keeping a tiny notebook beside my bed, to at least write down these fantastic ideas. Because I forget them as soon as I start making the school lunches, and can’t for the life of me, get those ideas back. So now you see why I find recording our weekly happenings as a family is so important. Because I’d simply just forget it all, wouldn’t I?
Ok. So I’m missing a few weeks in April, when I had only a disposable film camera at my disposal. {Mwahahahaha!} And yes, it has been kicking around inside my insidiously large handbag since then – 6 months – awaiting the day when I walk into a photo processor to get it developed. It has great camel-riding pictures on it. So, understandably, I left those few weeks out of my 365 until I processed and scanned them in. Um, I actually didn’t record the journalling then though ... So I’m hoping these pictures will be enough to trigger some kind of memories to record.
And the big gap from July – September? Um.... I think the dog ate it?
At the start of the year, when I had a really great system working, I would schedule my {Project 365} in every Sunday night, so that I would actually have a visual reminder to DO IT. Every week. And it worked, because I had a little box that I could tick each time I completed a week. I never got more than 3 weeks behind. But somewhere along the way, I stopped writing myself those calendar reminders and so then I forgot to get onto the computer late on Sunday night, and instead had a drink and a movie and went to bed. Weeks went by and I actually forgot {Project 365} existed.
Until now. THERE’S ONLY 10 WEEKS LEFT!
So. My plan of action is to start with this week. And then work backwards. I know there will be some weeks where I didn’t actually take any photos at all. ARRGGHHH!!! But all is not lost. I will look over my emails and see what was happening at that time. I will also take into consideration any birthdays during that time. And lastly, perhaps I should check my phone history and web browsing history to see what things we were researching/looking up during that time. These are all triggers that will help me fill in the blanks. And if I’m missing photos, there are other options.
I can fill the photo spaces with patterned paper. I can download a stock photo for something I am describing (like lots of rain, for example). I can scan in some of my children’s artwork for that period. If I am really desperate, I can substitute photos for thumbnails of my own layouts! I know I have been scrapping during that time. I could maybe even just cut and paste the journalling from some of those pages and include them in my 365. Because there are no rules saying you cannot plagiarise yourself!
{Project 365} is about memory keeping. Pure and simple. So I don’t really care about the kit or embellies I use to decorate it. I need to get down the photos and journalling. I will find triggers for that in some of the layouts I’ve created during that time. And it’s not like I’ll be repeating myself, for this is in a different format, and if experience is anything to go by – everyone in my family tends to read the {Project 365} album a hell of a lot more than they do their own individual scrapbook albums. Is that just because I have boys? I don’t know.
But now that my two eldest sons are starting to read, scrapbooking albums have taken on a whole new meaning for them. They can actually read them! They laugh and ask me if that really happened and they love to share their memories of it with me verbally. This gives me immense pleasure. And I’ve got to say, I greatly enjoy reading back through the {Project 365} albums too, marvelling at how quickly time passes me by. Wish my husband would look at them too, lol!!
So I think that’s a part of the problem here – I haven’t printed out any of my 2010 {Project 365} yet. I printed all of last years, every few months, in 8 inch x 8 inch format. But this year I was planning to print it out in a photobook – mainly because I think it is actually cheaper than to print each page individually – but also because the bound photobook just looks nicer, and I can print out multiple copies for the grandparents. (Not that I ever have, but the good intentions are there!)
I was spurred on throughout the year last year, because I’d read back through my albums and realised each time, what an amazing resource this project was. For families now, and for the future generations. Can you imagine your future daughter-in-law looking through your album and realising she is not the first woman to become a first time mum!!??? Priceless. She’d be able to read all about my own foray into motherhood and what challenges I faced at the time. How bloody interesting it would have been to have read the same thing about my own mother and grandmother!
So I’m telling you – keep at it. It’s just worth it. There are only 2.5 months to go. You can catch up on the missed weeks. Even if it means just publishing photos without a lot of journalling. I mean, anybody can write the who, what, where, when and why of a photo, right? Don’t worry about it being different to the method you have used in previous months. Don’t worry about having to include every single detail of what went on. Just summarise the best bits. Even just a few lines of journalling will be devoured by those who look through the album. In fact, graphic-design-ally speaking – less words are better – if you can manage to convey the message you intended in fewer words! Clearly, I cannot. The length of this post is testimony to that!
So. See-ya. And good luck with it.
** I have opened up my own {Project 365} album here, for you to gawk at.
*** I keep whispering {Project 365} because I’ve found out it’s actually a trademarked phrase now! So perhaps that is why this scrappy phenomenon is slowly being referred to as “Photo-A-Day” and “365 Challenge” and “Project 52”. Just so you know ...!
But, that’s ok. I can do it. And so can you. So you may have fallen behind a little lately. I know I’ve got a great excuse for doing so. {You probably do too}. I’ve been designing up a storm! Trying to stockpile a heap of kits and digital scrapping goodies for when I launch into the digital design world come 2011. I’m gonna be famous baby! (well, I want to sell something at least!) And I’ve been doing a hell of a lot of layouts for my CT designers.
Try this for size: 56 layouts for Mscraps.com in the month of September. And that’s not the only Creative Team I’m on, you with me? But it’s just that there are sooooo many great products out there that beg me to download them and give them a try. Honestly, I lie awake at night thinking about all these page ideas and special techniques that I could try out on the next layout. And then, when it comes to 4:30am and I STILL can’t get to sleep, I get up, make myself a cuppa and get onto the computer pronto – I need to release these creative endorphins! PRONTO!
So I’ve taken to keeping a tiny notebook beside my bed, to at least write down these fantastic ideas. Because I forget them as soon as I start making the school lunches, and can’t for the life of me, get those ideas back. So now you see why I find recording our weekly happenings as a family is so important. Because I’d simply just forget it all, wouldn’t I?
Ok. So I’m missing a few weeks in April, when I had only a disposable film camera at my disposal. {Mwahahahaha!} And yes, it has been kicking around inside my insidiously large handbag since then – 6 months – awaiting the day when I walk into a photo processor to get it developed. It has great camel-riding pictures on it. So, understandably, I left those few weeks out of my 365 until I processed and scanned them in. Um, I actually didn’t record the journalling then though ... So I’m hoping these pictures will be enough to trigger some kind of memories to record.
And the big gap from July – September? Um.... I think the dog ate it?
At the start of the year, when I had a really great system working, I would schedule my {Project 365} in every Sunday night, so that I would actually have a visual reminder to DO IT. Every week. And it worked, because I had a little box that I could tick each time I completed a week. I never got more than 3 weeks behind. But somewhere along the way, I stopped writing myself those calendar reminders and so then I forgot to get onto the computer late on Sunday night, and instead had a drink and a movie and went to bed. Weeks went by and I actually forgot {Project 365} existed.
Until now. THERE’S ONLY 10 WEEKS LEFT!
So. My plan of action is to start with this week. And then work backwards. I know there will be some weeks where I didn’t actually take any photos at all. ARRGGHHH!!! But all is not lost. I will look over my emails and see what was happening at that time. I will also take into consideration any birthdays during that time. And lastly, perhaps I should check my phone history and web browsing history to see what things we were researching/looking up during that time. These are all triggers that will help me fill in the blanks. And if I’m missing photos, there are other options.
I can fill the photo spaces with patterned paper. I can download a stock photo for something I am describing (like lots of rain, for example). I can scan in some of my children’s artwork for that period. If I am really desperate, I can substitute photos for thumbnails of my own layouts! I know I have been scrapping during that time. I could maybe even just cut and paste the journalling from some of those pages and include them in my 365. Because there are no rules saying you cannot plagiarise yourself!
{Project 365} is about memory keeping. Pure and simple. So I don’t really care about the kit or embellies I use to decorate it. I need to get down the photos and journalling. I will find triggers for that in some of the layouts I’ve created during that time. And it’s not like I’ll be repeating myself, for this is in a different format, and if experience is anything to go by – everyone in my family tends to read the {Project 365} album a hell of a lot more than they do their own individual scrapbook albums. Is that just because I have boys? I don’t know.
But now that my two eldest sons are starting to read, scrapbooking albums have taken on a whole new meaning for them. They can actually read them! They laugh and ask me if that really happened and they love to share their memories of it with me verbally. This gives me immense pleasure. And I’ve got to say, I greatly enjoy reading back through the {Project 365} albums too, marvelling at how quickly time passes me by. Wish my husband would look at them too, lol!!
So I think that’s a part of the problem here – I haven’t printed out any of my 2010 {Project 365} yet. I printed all of last years, every few months, in 8 inch x 8 inch format. But this year I was planning to print it out in a photobook – mainly because I think it is actually cheaper than to print each page individually – but also because the bound photobook just looks nicer, and I can print out multiple copies for the grandparents. (Not that I ever have, but the good intentions are there!)
I was spurred on throughout the year last year, because I’d read back through my albums and realised each time, what an amazing resource this project was. For families now, and for the future generations. Can you imagine your future daughter-in-law looking through your album and realising she is not the first woman to become a first time mum!!??? Priceless. She’d be able to read all about my own foray into motherhood and what challenges I faced at the time. How bloody interesting it would have been to have read the same thing about my own mother and grandmother!
So I’m telling you – keep at it. It’s just worth it. There are only 2.5 months to go. You can catch up on the missed weeks. Even if it means just publishing photos without a lot of journalling. I mean, anybody can write the who, what, where, when and why of a photo, right? Don’t worry about it being different to the method you have used in previous months. Don’t worry about having to include every single detail of what went on. Just summarise the best bits. Even just a few lines of journalling will be devoured by those who look through the album. In fact, graphic-design-ally speaking – less words are better – if you can manage to convey the message you intended in fewer words! Clearly, I cannot. The length of this post is testimony to that!
So. See-ya. And good luck with it.
** I have opened up my own {Project 365} album here, for you to gawk at.
*** I keep whispering {Project 365} because I’ve found out it’s actually a trademarked phrase now! So perhaps that is why this scrappy phenomenon is slowly being referred to as “Photo-A-Day” and “365 Challenge” and “Project 52”. Just so you know ...!

Closet Culling and Less-Is-More Principle
I wrote this post back in early April. Enjoy.
Ok. I've got a lot of traditional scrapbooking stuff littered throughout my "scrap-room". I put that in inverted commas because my husband seems to think it's the "junk-room" or "dump-anything-in-here that-doesn't-belong-on-the-kitchen-bench room". And my kiddies use it as the "I-want-to-create-with-Mum" room, full of lovely, space-consuming art paper "inventions" that they show me and want me to record somewhere (even if just inside my brain).
So it's junky. And I hate that.
But it IS the right colour. Thanks to my recent home-decor painting spurt. And it IS starting to resemble the space that I want it to be. Small parts are coming together. The rest is just ... well, a change of habit. Mess that needs to be catalogued, fixed, finished or thrown away. (That's awfully hard to do when you're a hoarder). It takes about 30 days to change a habit. Or in my case, 30 years.
I always thought I was tidy. I mean, I can remember at uni having my top desk drawer utterly organised and everything had a place. I knew when someone had taken off with my sticky tape, because it had left a gaping hole in my draw. I knew where to find a working pen. I knew I had staples still in my stapler.
With a family of five, however, it's become somewhat difficult to keep everything in it's place - and especially hard if there's no "place" to put it in anymore because there is TOO MUCH MESS!
It's so easy to pack away at pre-school, because everything has a box to put it in. And bad, bad stuff, like permanent pens, are not within kiddy reach. They are never, I repeat never, left on the dashboard of your new car.
It's easy to clean up after a holiday in a cabin at the beach, because the three outfits you chose for everybody to wear throughout the week have already been washed and hung and folded ready for next use. No overflowing washing baskets to "catch up" with. And toys! Well, they all fit into a single backpack. It's no headache at all packing up while on holidays. Because you've only got a car load and not a lifetime load.
But come home, and well, there's just way too much stuff to handle. Toys overflow from one room to another. Clothes hang out of washing baskets like I haven't laundered in 5 years. Can you guess what I've been doing today?
Yep. I've culled.
Which, for a hoarder like me, is hard. But it gets remarkably easier each time I do it. And I've truly got to wait until I have stuff spilling out of my ears like today, to get into the right frame of mind to do it successfully.
I've cleaned out my kid's closests. They were overflowing. I figure if they have less clothes to change into every five seconds, then I'll have less washing / ironing / grief thereafter. So each boy now has no more than seven shorts / t-shirts/ tops / trousers. Well, actually, my eldest son has only really got one of everything because he doesn't get any hand-me-downs from cousins.
My second son had way too many clothes that are now waiting to be stored long-term until our next boy comes along (JOY JOY JOY if that happened!) or to be given away to my siblings for use with my future nephews. Whichever comes first. Spread the joy, I say. He was inheriting hand-me-downs from three cousins and well, it all got a bit much really. I loved most of the items, but I really don't think he'll ever wear 28 t-shirts. Not before he grows out of them in 6 months.
So now they have nice, sparse shelves. And it even allows for untidy re-folder's like Riley, who can't seem to get the whole "put it back as you found it" scenario. And they can see the "piles" each item belongs to. I've even made up some shelf labels for those of us who are still reading-impaired.

So my moral today is really LESS IS MORE.
Less stuff = More room for sanity inside your head.
Less mess = More time to enjoy life.
Less stress = More liklihood you'll enjoy time with your offspring.
Less clutter = More independent children. And husbands. (They don't need to ask you where everything is ...)
So what are you doing today? Tell me your tips for a more organised life and share your sucesses / failures with the rest of us struggling mums!
I wrote this post back in early April. Enjoy.
Ok. I've got a lot of traditional scrapbooking stuff littered throughout my "scrap-room". I put that in inverted commas because my husband seems to think it's the "junk-room" or "dump-anything-in-here that-doesn't-belong-on-the-kitchen-bench room". And my kiddies use it as the "I-want-to-create-with-Mum" room, full of lovely, space-consuming art paper "inventions" that they show me and want me to record somewhere (even if just inside my brain).
So it's junky. And I hate that.
But it IS the right colour. Thanks to my recent home-decor painting spurt. And it IS starting to resemble the space that I want it to be. Small parts are coming together. The rest is just ... well, a change of habit. Mess that needs to be catalogued, fixed, finished or thrown away. (That's awfully hard to do when you're a hoarder). It takes about 30 days to change a habit. Or in my case, 30 years.
I always thought I was tidy. I mean, I can remember at uni having my top desk drawer utterly organised and everything had a place. I knew when someone had taken off with my sticky tape, because it had left a gaping hole in my draw. I knew where to find a working pen. I knew I had staples still in my stapler.
With a family of five, however, it's become somewhat difficult to keep everything in it's place - and especially hard if there's no "place" to put it in anymore because there is TOO MUCH MESS!
It's so easy to pack away at pre-school, because everything has a box to put it in. And bad, bad stuff, like permanent pens, are not within kiddy reach. They are never, I repeat never, left on the dashboard of your new car.
It's easy to clean up after a holiday in a cabin at the beach, because the three outfits you chose for everybody to wear throughout the week have already been washed and hung and folded ready for next use. No overflowing washing baskets to "catch up" with. And toys! Well, they all fit into a single backpack. It's no headache at all packing up while on holidays. Because you've only got a car load and not a lifetime load.
But come home, and well, there's just way too much stuff to handle. Toys overflow from one room to another. Clothes hang out of washing baskets like I haven't laundered in 5 years. Can you guess what I've been doing today?
Yep. I've culled.
Which, for a hoarder like me, is hard. But it gets remarkably easier each time I do it. And I've truly got to wait until I have stuff spilling out of my ears like today, to get into the right frame of mind to do it successfully.
I've cleaned out my kid's closests. They were overflowing. I figure if they have less clothes to change into every five seconds, then I'll have less washing / ironing / grief thereafter. So each boy now has no more than seven shorts / t-shirts/ tops / trousers. Well, actually, my eldest son has only really got one of everything because he doesn't get any hand-me-downs from cousins.
My second son had way too many clothes that are now waiting to be stored long-term until our next boy comes along (JOY JOY JOY if that happened!) or to be given away to my siblings for use with my future nephews. Whichever comes first. Spread the joy, I say. He was inheriting hand-me-downs from three cousins and well, it all got a bit much really. I loved most of the items, but I really don't think he'll ever wear 28 t-shirts. Not before he grows out of them in 6 months.
So now they have nice, sparse shelves. And it even allows for untidy re-folder's like Riley, who can't seem to get the whole "put it back as you found it" scenario. And they can see the "piles" each item belongs to. I've even made up some shelf labels for those of us who are still reading-impaired.

So my moral today is really LESS IS MORE.
Less stuff = More room for sanity inside your head.
Less mess = More time to enjoy life.
Less stress = More liklihood you'll enjoy time with your offspring.
Less clutter = More independent children. And husbands. (They don't need to ask you where everything is ...)
So what are you doing today? Tell me your tips for a more organised life and share your sucesses / failures with the rest of us struggling mums!
How Many Is Too Many Albums?
I've come across this question a bit lately. I've asked it myself a dozen times. You each have to find your own answer because there are so many variables when it comes down to it.
I've currently filled 3 albums per child (= 9) and also have 3 Family albums, and each child has a separate School album (made with paper supplies and which house all their school books and certificates and formal school photos).
So that's a grand total of 14. So far. And they are aged 2 (no school album started yet, but the supplies are ready and waiting - they match the other two siblings' school albums), 5 and 7.
 But there comes into play a few variables when working out these figures:
When you discovered scrapping: I did a bit of sticking photos on fancy coloured paper when my first was born. I even used to try using the same bit of paper twice over by sticking more photos on the back of it (!!) Most of it was simply writing down everything I thought I'd like to remember. I didn't really realise there was a world of inspiration out there about how to make it more creative.
Traditional Paper v's Digital: Paper scrapping is one. hell. of. a. lot. slower.
How organised you are at cataloguing / printing out photos: Specifically for you paper scrappers out there - a lot of it depends on what photos you have on hand when the creative urge hits. And for digi scrappers, if you can't bloody-well find the darn photos on your computer, then it's hardly going to entice you to scrap much.
The Size you Scrap At: I've got a lot of mini-albums that only take one sitting to finish. Do these count? Well, they each record a bit about us as a family. So yeah, I guess they do count.
Your Own Scrapping Style: Are you a multi-photo scrapper, or a portrait one?
So my grand total is far too many to count. Is that excessive?
It's really up to you to decide how many albums you want to make. I don't think it would make me happy to limit myself creatively. Yes, I do scrap and print them out and album them all up, with the end goal to be to present them to my children, or their wives, so that their childhood can be understood and reminisced about. And it may be a bit cumbersome to walk out the door with 50 albums.
But I also do it for me. I like scrapping. I like reading back over them a year or two later. I love, love, love it when the kids get them out and look at the pictures. My eldest is now reading, so it's even more of a pleasure for me to hear him quoting my journalling back at me.
I guess I probably should try to slow down. For neatness' sake. But to hell with that. I've got lots to tell about my family. About my thoughts. About our experiences together. And I like recording them.
I've come across this question a bit lately. I've asked it myself a dozen times. You each have to find your own answer because there are so many variables when it comes down to it.
I've currently filled 3 albums per child (= 9) and also have 3 Family albums, and each child has a separate School album (made with paper supplies and which house all their school books and certificates and formal school photos).
So that's a grand total of 14. So far. And they are aged 2 (no school album started yet, but the supplies are ready and waiting - they match the other two siblings' school albums), 5 and 7.
Whoa.
That's a lot. I mean, it's a lot just to house here on the bookshelf, let alone for them to take with them when they move outta home. By then, keeping the current average, they'd have, oh, say 12 volumes each. Average. That's a whole lotta real estate space they are consuming.
 But there comes into play a few variables when working out these figures:
More baby photos = more layouts scrapped. As they get older, there are fewer "milestones" or "cute" moments to scrap about. Sorry, no offence, but it's just a reality. There's less to scrap about as the growth rate slows. In my experience, anyway :)
First child v's Third child: I try to keep the number of layouts per child at roughly the same number, but, well, my third child happened to be my first little girl. So, well, I had a whole lot of new experiences as a mother to scrap about. So she probably has even more pages than my first.
Age of the children: My first and second children were born pre-digital camera days (doesn't that sound OLD??) So I obviously took a lot less photos back then, because it was an expensive business to snap away "blind" (that is, for you post-digital generational folk out there reading this, on film cameras you didn't know how well your photos came out until you got it back from the processor months later.)
When you discovered scrapping: I did a bit of sticking photos on fancy coloured paper when my first was born. I even used to try using the same bit of paper twice over by sticking more photos on the back of it (!!) Most of it was simply writing down everything I thought I'd like to remember. I didn't really realise there was a world of inspiration out there about how to make it more creative.
Traditional Paper v's Digital: Paper scrapping is one. hell. of. a. lot. slower.
How organised you are at cataloguing / printing out photos: Specifically for you paper scrappers out there - a lot of it depends on what photos you have on hand when the creative urge hits. And for digi scrappers, if you can't bloody-well find the darn photos on your computer, then it's hardly going to entice you to scrap much.
The Size you Scrap At: I've got a lot of mini-albums that only take one sitting to finish. Do these count? Well, they each record a bit about us as a family. So yeah, I guess they do count.
Your Own Scrapping Style: Are you a multi-photo scrapper, or a portrait one?
So my grand total is far too many to count. Is that excessive?
It's really up to you to decide how many albums you want to make. I don't think it would make me happy to limit myself creatively. Yes, I do scrap and print them out and album them all up, with the end goal to be to present them to my children, or their wives, so that their childhood can be understood and reminisced about. And it may be a bit cumbersome to walk out the door with 50 albums.
But I also do it for me. I like scrapping. I like reading back over them a year or two later. I love, love, love it when the kids get them out and look at the pictures. My eldest is now reading, so it's even more of a pleasure for me to hear him quoting my journalling back at me.
I guess I probably should try to slow down. For neatness' sake. But to hell with that. I've got lots to tell about my family. About my thoughts. About our experiences together. And I like recording them.
Getting Published
The more I get my work published in magazines, the more I realise how clueless I am about which layouts to send in.
There are the ones I feel aren't very striking or particularly technical. Yet, they will get published. There are some layouts that I feel particularly strong about and supremely happy with, and they don't get a response from other people at all.
When you're a crafter, it's hard to look at your work objectively and know if it's good enough or not. Your judgement can be clouded by so many factors, least of all your emotional attachment to the subject matter.
Only the trained eye can guage how much time and endless, finicky effort went into your creation. To most people, it's just a gorgeous, lovingly hand-crafted photo decoration. They do not see the processes behind it all - how hard it was to cover those chipboard letters, the mess you made embossing that embellishment, or how finnicky it was to sew around that title. Especially with your crappy sewing machine!
And I guess that's part of it all - you want your layout or card to look so professional that there is no evidence of all behind-the-scenes stuff.
So because it is so hard to know what the magazines want, my advice is to send in anything remotely good and sit and wait for a response. You have to be in it to win it.
I know with traditional scrapping, it certainly helps to have a lot of the latest releases piled high onto your page. You also have to be good at photographing or scanning your page to show them a preview before sending the real one in. Make sure you photograph it in good light and don't use a flash. Crop your image to include only the page, not the carpet behind it! You need to be willing to part with your original creation for about 6 months if you get accepted, and be willing to pay postage. Keep a list of all the brand names of the materials you use - you'll need them.
With digital, I think it's a lot easier. For a start, you just need to resize your layout to 72dpi and send that in as a preview. Send only one layout per email. Send that email to lots of different magazines. Don't be embarassed to send off fifty emails in one stint. If you get an acceptance offer, you're going to need to list all your materials. Here's where a good organised digi supplies program comes in.
I use ACDSee to organise my supplies. It's a tedious process of tagging each element/paper/brush but it helps when you've got to go back and find the exact piece to list in your materials blurb. These designers have spent a lot of time and effort creating the stuff you use on your layouts, so I think it's imperative to give them Kudos for it :)
A more efficient method would be to list the materials you use straight after you've completed your layout, on the off chance you send it in and it gets published. I tag all of my materials into a new favourites folder and then, if a particular layout gets accepted, I can just bring up my favourites folder with that layout name on it, and it's all there. It sure beats 6 hours of searching back through all your stash trying to find the name of that brush you used 6 months ago!
Most magazines have specific submission calls, which you should refer to in your subject line. But they are almost always looking for "general" layouts or "digital" layouts too, so don't restrict your submissions only to those they've called for.
Don't create layouts specifically for magazines. It doesn't work. Create what you want, when you want. It'll turn out 100 per cent better than something you've created only through motivation to be published. When it's finished, then browse the different submission calls and see where it might fit in. Remember, there is always just plain old generic "digital" or "general" submission calls too. And if you've never been published before, then add "newbie" or "fresh face" to your subject line.
When you get that acceptance email, act on it straight away. Do all the paper work, and post it in!
So to recap:
1. create first, submit last.
2. write down all your supplies and their brand names
3. Browse submission calls and see where your layout / card might fit in
4. Send in anything else under the "general" category
5. Send in more than you think will get published
6. Don't be surprised if something you think is fairly ordinary actually gets accepted!
7. When you receive that acceptance email, ACT FAST! Deadlines are deadlines, after all.
Edited: In recent days since I wrote this blog post, my friend Brittney has had a cute layout accepted in Scrapbooking Memories after much pushing from me to start submitting her stuff to the magazines. She was ecstatic! And so was I! So if you want some very one-on-one advice or pushing, please don't hesitate to email me for some guidance. I'm really happy to help. Congratulations Brittney!
The more I get my work published in magazines, the more I realise how clueless I am about which layouts to send in.
There are the ones I feel aren't very striking or particularly technical. Yet, they will get published. There are some layouts that I feel particularly strong about and supremely happy with, and they don't get a response from other people at all.
When you're a crafter, it's hard to look at your work objectively and know if it's good enough or not. Your judgement can be clouded by so many factors, least of all your emotional attachment to the subject matter.
Only the trained eye can guage how much time and endless, finicky effort went into your creation. To most people, it's just a gorgeous, lovingly hand-crafted photo decoration. They do not see the processes behind it all - how hard it was to cover those chipboard letters, the mess you made embossing that embellishment, or how finnicky it was to sew around that title. Especially with your crappy sewing machine!
And I guess that's part of it all - you want your layout or card to look so professional that there is no evidence of all behind-the-scenes stuff.
So because it is so hard to know what the magazines want, my advice is to send in anything remotely good and sit and wait for a response. You have to be in it to win it.
I know with traditional scrapping, it certainly helps to have a lot of the latest releases piled high onto your page. You also have to be good at photographing or scanning your page to show them a preview before sending the real one in. Make sure you photograph it in good light and don't use a flash. Crop your image to include only the page, not the carpet behind it! You need to be willing to part with your original creation for about 6 months if you get accepted, and be willing to pay postage. Keep a list of all the brand names of the materials you use - you'll need them.
With digital, I think it's a lot easier. For a start, you just need to resize your layout to 72dpi and send that in as a preview. Send only one layout per email. Send that email to lots of different magazines. Don't be embarassed to send off fifty emails in one stint. If you get an acceptance offer, you're going to need to list all your materials. Here's where a good organised digi supplies program comes in.
I use ACDSee to organise my supplies. It's a tedious process of tagging each element/paper/brush but it helps when you've got to go back and find the exact piece to list in your materials blurb. These designers have spent a lot of time and effort creating the stuff you use on your layouts, so I think it's imperative to give them Kudos for it :)
A more efficient method would be to list the materials you use straight after you've completed your layout, on the off chance you send it in and it gets published. I tag all of my materials into a new favourites folder and then, if a particular layout gets accepted, I can just bring up my favourites folder with that layout name on it, and it's all there. It sure beats 6 hours of searching back through all your stash trying to find the name of that brush you used 6 months ago!
Most magazines have specific submission calls, which you should refer to in your subject line. But they are almost always looking for "general" layouts or "digital" layouts too, so don't restrict your submissions only to those they've called for.
Don't create layouts specifically for magazines. It doesn't work. Create what you want, when you want. It'll turn out 100 per cent better than something you've created only through motivation to be published. When it's finished, then browse the different submission calls and see where it might fit in. Remember, there is always just plain old generic "digital" or "general" submission calls too. And if you've never been published before, then add "newbie" or "fresh face" to your subject line.
When you get that acceptance email, act on it straight away. Do all the paper work, and post it in!
So to recap:
1. create first, submit last.
2. write down all your supplies and their brand names
3. Browse submission calls and see where your layout / card might fit in
4. Send in anything else under the "general" category
5. Send in more than you think will get published
6. Don't be surprised if something you think is fairly ordinary actually gets accepted!
7. When you receive that acceptance email, ACT FAST! Deadlines are deadlines, after all.
Edited: In recent days since I wrote this blog post, my friend Brittney has had a cute layout accepted in Scrapbooking Memories after much pushing from me to start submitting her stuff to the magazines. She was ecstatic! And so was I! So if you want some very one-on-one advice or pushing, please don't hesitate to email me for some guidance. I'm really happy to help. Congratulations Brittney!
Let Go of Your Journalling Demons
As you would already know, I'm a BIG journalling fan. I just don't see the point of having pages which sure look pretty but will have the viewer stumped in 20 years time. What the hell's it meant to be about?
I know some people have difficulty journalling. Luckily, I've never had that problem, I like writing, and it's my job. But for those of you who do, here are some points to consider next time you're procrastinating and hyper-ventilating at the thought of putting pen to paper on your layouts.
1. If all else fails, just remember the golden who + what + when + where + how. If you answer all these, you're laughing.
2. Start writing it down from the beginning, the middle or the end. Doesn't matter. Just get it down. You can rearrange it after it's all out of your head. Just do it on a scrap piece of paper before committing it to the layout.
3. You know how you mentioned this story/event to your friend the other day? You should write it down as if you're telling it to another friend, verbally. Say it out loud if you have to, then write down what you said after. Informal journalling speaks volumes, and puts the reader at ease. And it is, after all, a photo memory album, not a textbook.
4. Be in the mood to tell the story. Just like people can tell if you're smiling over the phone, readers can tell if you're bored sh**l*ss as you write.
5. Don't be put off by perfectionism. Nobody writes perfectly all of the time. This page is about you, and how you feel about the person you're journalling about. The words will come to you as you go. Don't go back and try to change it back into something staid and perfect. Be personnal.
So if you've been holding back from journalling on your layouts, why not give it another go? And if you're an expert, post your tips in my comments. Share and grow.
Here are some of my layouts which utilise journalling. It can sometimes be easier to make the journalling a bit part of your design, if you're like me and take a bit too long to tell your story...


As you would already know, I'm a BIG journalling fan. I just don't see the point of having pages which sure look pretty but will have the viewer stumped in 20 years time. What the hell's it meant to be about?
I know some people have difficulty journalling. Luckily, I've never had that problem, I like writing, and it's my job. But for those of you who do, here are some points to consider next time you're procrastinating and hyper-ventilating at the thought of putting pen to paper on your layouts.
1. If all else fails, just remember the golden who + what + when + where + how. If you answer all these, you're laughing.
2. Start writing it down from the beginning, the middle or the end. Doesn't matter. Just get it down. You can rearrange it after it's all out of your head. Just do it on a scrap piece of paper before committing it to the layout.
3. You know how you mentioned this story/event to your friend the other day? You should write it down as if you're telling it to another friend, verbally. Say it out loud if you have to, then write down what you said after. Informal journalling speaks volumes, and puts the reader at ease. And it is, after all, a photo memory album, not a textbook.
4. Be in the mood to tell the story. Just like people can tell if you're smiling over the phone, readers can tell if you're bored sh**l*ss as you write.
5. Don't be put off by perfectionism. Nobody writes perfectly all of the time. This page is about you, and how you feel about the person you're journalling about. The words will come to you as you go. Don't go back and try to change it back into something staid and perfect. Be personnal.
So if you've been holding back from journalling on your layouts, why not give it another go? And if you're an expert, post your tips in my comments. Share and grow.
Here are some of my layouts which utilise journalling. It can sometimes be easier to make the journalling a bit part of your design, if you're like me and take a bit too long to tell your story...

Sweet Icypole Bandit uses a Jessica Sprague text semi-circle text path, Andrea Victoria cardstock, Katie Pertiet and Ivy's Inspirations patterned paper and Ivy's Inspirations elements.

This is a really old layout, I think it uses a tutorial by Cassie Jones, which included all the elements and papers in it.

Church uses Lindsay Jane Designs postage frame, Anna Aspnes stitching and Jesse Edwards cloud patterned paper.

This layout has Jessica sprague written all over it, lol! I think I got the idea of 3 jaggered journalling columns from an article she had in Creating Keepsakes. I know that flower is from Shabby Princess, the tag is Katie Pertiet's, but the epoxy brad I'm not surte about, sorry. The flourish brush is the FIRST digital scrapping supply I ever got, it's from Rhonna Farrer.
10-minute Layouts
Ok. I know this may shock some of you die-hard crafty fans out there. But sometimes all I want to do is get down my story and throw a photo in with it, and call it done. It is at these times, I'll revert to using a template, or simply open up just one kit, and use only what's available within that kit for that layout. This makes the layout really quick - 1. I don't have to think of where to place each part of the page - the sketch has already decided that for me. 2. I don't have to go searching through my supplies to find something special - I've limited myself to just what's in the kit.
Now you could work with this method as a paper scrapper too. You just need to have your photo printed out, and grab only a handful of supplies to sit upon your table before you begin. Don't, whatever you do, rifle through your stash midway through the layout - that's cheating. Use only what you have dedicated to the layout from the start. You'll be amazed at how much stress and indecision it frees up. Just go with the flow.
I like to put on my background paper (or cardstock) first. Then pile up all my elements into a bundle on one corner of the layout page. Then I insert my photo where I want it. Then I add drop shadows (even sometimes use the ghastly photoshop presets!) and save, resize for web, save again. Done.
Here is one I've just done. No kidding. Less than 10 minutes.


Ok. I know this may shock some of you die-hard crafty fans out there. But sometimes all I want to do is get down my story and throw a photo in with it, and call it done. It is at these times, I'll revert to using a template, or simply open up just one kit, and use only what's available within that kit for that layout. This makes the layout really quick - 1. I don't have to think of where to place each part of the page - the sketch has already decided that for me. 2. I don't have to go searching through my supplies to find something special - I've limited myself to just what's in the kit.
Now you could work with this method as a paper scrapper too. You just need to have your photo printed out, and grab only a handful of supplies to sit upon your table before you begin. Don't, whatever you do, rifle through your stash midway through the layout - that's cheating. Use only what you have dedicated to the layout from the start. You'll be amazed at how much stress and indecision it frees up. Just go with the flow.
I like to put on my background paper (or cardstock) first. Then pile up all my elements into a bundle on one corner of the layout page. Then I insert my photo where I want it. Then I add drop shadows (even sometimes use the ghastly photoshop presets!) and save, resize for web, save again. Done.
Here is one I've just done. No kidding. Less than 10 minutes.

Ok, I know this is one of the rare occassions where I haven't used any journalling at all. And if I had a bit more time, maybe I'd add something to justify this page in an album. Like what he's into right now. Or what we were doing on this day (but I'm going to do another page explaining this). Or do an interview with him to see what he's thinking about lately. Or re-tell some dream or story he's come home with since starting school. But tonight, I'm happy just to play and leave this as it is. A wonderful 10 minute page with a very simple message, I love you.

This page is made using Sabrina's Love Me Do kit from Shabby Pickle.
Spring Sunshine & Colours to Match


These first two use the "Little Shores" kit from Designerdigitals. I just love these colours atm. Although I've never been a fan of yellow, I think it goes well here, and you can't really get away from it with those floaties! The kit just shouts Springtime and Fun and Kids and Water, doesn't it!


If you are new to digi, try downloading their free kit "Tag This" first.
Cya,
Katharyn
Well it's been a crazy, crazy week without a computer! I know I've said it before, but I really, really rely on it to do everything - banking, keeping contact with friends & family, doing photography, keeping a schedule, etc etc.
Good thing is, that after I freakishly deleted 55GB worth of photoshop projects with just ONE click of a button, the computer geeks were able to restore most of them back to my computer from the netherlands of cyberspace. I really don't know what came over me - I decided to spring clean my computer storage and somehow copied one photoshop folder and pasted it onto an EHD, but then went back to my computer and deleted a different folder instead - one that I had NO BACK UP COPIES of. Huh.
Bad thing is they couldn't restore my EHD, so three months worth of photos are lost forever. I do regular back ups, but it has obviously been longer than I thought between burns.
Trying to keep up with my new scrapping commitments was a test - especially without a computer with Photoshop, but it has all turned out ok. Challenging. But ok.
So. BACK UP REGULARLY. Maybe every month. And not just to an EHD - Burn, baby, burn onto DVD.
Here are some layouts completed today.

First Swim Nov09
I've also been happily playing with the newest digital collection from Kaisercraft, called "Hideaway". It's got so many possibilities! Just love the gorgeous bird stamps. I wanted to use so much stuff all on the one layout, but had to restrain myself.
As my layouts have not yet appeared on their blog, I can only show you a glimpse.
If you are new to digi, try downloading their free kit "Tag This" first.
Cya,
Katharyn
Why I don't Scrap In Order
Because I don't enjoy it as much.
Simple.
As Janet put it: thedailydigi
This is exactly what I do. And I even do it with paper layouts. I use up some of my favourite papers or elements on two or three layouts at a time. They are of different children, they are of different time periods, they are about different topics. So they will never be side by side in an album.
And if they were .... so what?
As I explained to Master 4 today, the police come to the scene of an accident to help people, see if they need an ambulance, and to figure out if anyone has done something bad to cause the accident. I don't think they'll chase me up on my scrapping albums when I use my products more than once on adjoining spreads!
Because I don't enjoy it as much.
Simple.
As Janet put it: thedailydigi
This is exactly what I do. And I even do it with paper layouts. I use up some of my favourite papers or elements on two or three layouts at a time. They are of different children, they are of different time periods, they are about different topics. So they will never be side by side in an album.
And if they were .... so what?
As I explained to Master 4 today, the police come to the scene of an accident to help people, see if they need an ambulance, and to figure out if anyone has done something bad to cause the accident. I don't think they'll chase me up on my scrapping albums when I use my products more than once on adjoining spreads!
Cyber-ically Challenged
When you enter the world of digi scrapping, you realise pretty quickly that you have to master a new language and learn to communicate online in ways that are far more advanced than, oh, say - email (which is the level of my comfort zone).
I have found myself registering for "forums". (You can read through topics of hot discussion to find out if anyone else has had your computer glitch before).
You can "Upload" to "Galleries". (Placing your low-resolution images of your layouts onto the web in special scrapbooking galleries for other people to admire/revolt from and comment on).
You can "Post" "new Threads" to ask someone a question - about scrapbooking, digital genius, or just plain old general around-the-water-cooler discussion.
You can create an "Avatar" (A low-resolution mugshot of yourself, or any image you identify with, which is attached to your comments/threads/posts so that others can put a face to a name).
You can squiz at other scrappers' galleries and "scraplift" their designs (so long as you credit them by using a "hyperlink" back to their original image post). Coming from a journalist's background, it's odd to learn that this is actually an accepted practice - share the love, no commercial royalties involved!
You can create a "hyperlink" to direct viewers back to your own blog/website - and you can set it up so it opens on a separate page instead of them navigating away from their original page of interest. This is always good for people like me, who feel a resolute need to FINISH whatever page I started, which equates to having 50 computer pages open at once. No wonder my high-powered computer runs so terrifically slow.
You can create a "signature" which includes flashing signs identifying the sites you consider favourites or where you've done your last cyber-class etc. It's great "word-of-mouth" advertising which users are usually happy to promote because of their online loyalties.
You can participate in online "challenges" - basically to keep your scrapping mojo happening. New ideas, new thoughts, scrapping outside your comfort zone - and with any luck, you'll win something!
You can buy must-have products immediately - I'm talking at 2am in the morning when you need something to finish your MASTERPIECE page. Well, at least YOU think it's a masterpiece. Time will tell .... Just go online, search for that charm/paper/whatssit, add it to your cart and hey presto! You can download it immediately! (Well, as long as your credit card isn't already maxxed out ...)
You can chat with the product designers. I mean seriously, it's a bit special they are talking to little ol' me, isn't it! (gush gush gush!)
You can do all this while rocking your baby to sleep. Enough said. One hangded.
You can make new firends who share your interests. Noice.
Pretty soon I'm going to undergo my first cyber scrap. And cyber chat. I've never chatted online before - it first came about when I was at university and was basically a porn fetish thing. So, (sarcastically) WILD as I am, I haven't yet tried it out.
Will keep you posted as I learn more about this whole new world. It's such a learning curve, but one which is so totally exciting to a stay-at-home mum who's been out of the office environment for SIX YEARS!
When you enter the world of digi scrapping, you realise pretty quickly that you have to master a new language and learn to communicate online in ways that are far more advanced than, oh, say - email (which is the level of my comfort zone).
I have found myself registering for "forums". (You can read through topics of hot discussion to find out if anyone else has had your computer glitch before).
You can "Upload" to "Galleries". (Placing your low-resolution images of your layouts onto the web in special scrapbooking galleries for other people to admire/revolt from and comment on).
You can "Post" "new Threads" to ask someone a question - about scrapbooking, digital genius, or just plain old general around-the-water-cooler discussion.
You can create an "Avatar" (A low-resolution mugshot of yourself, or any image you identify with, which is attached to your comments/threads/posts so that others can put a face to a name).
You can squiz at other scrappers' galleries and "scraplift" their designs (so long as you credit them by using a "hyperlink" back to their original image post). Coming from a journalist's background, it's odd to learn that this is actually an accepted practice - share the love, no commercial royalties involved!
You can create a "hyperlink" to direct viewers back to your own blog/website - and you can set it up so it opens on a separate page instead of them navigating away from their original page of interest. This is always good for people like me, who feel a resolute need to FINISH whatever page I started, which equates to having 50 computer pages open at once. No wonder my high-powered computer runs so terrifically slow.
You can create a "signature" which includes flashing signs identifying the sites you consider favourites or where you've done your last cyber-class etc. It's great "word-of-mouth" advertising which users are usually happy to promote because of their online loyalties.
You can participate in online "challenges" - basically to keep your scrapping mojo happening. New ideas, new thoughts, scrapping outside your comfort zone - and with any luck, you'll win something!
You can buy must-have products immediately - I'm talking at 2am in the morning when you need something to finish your MASTERPIECE page. Well, at least YOU think it's a masterpiece. Time will tell .... Just go online, search for that charm/paper/whatssit, add it to your cart and hey presto! You can download it immediately! (Well, as long as your credit card isn't already maxxed out ...)
You can chat with the product designers. I mean seriously, it's a bit special they are talking to little ol' me, isn't it! (gush gush gush!)
You can do all this while rocking your baby to sleep. Enough said. One hangded.
You can make new firends who share your interests. Noice.
Pretty soon I'm going to undergo my first cyber scrap. And cyber chat. I've never chatted online before - it first came about when I was at university and was basically a porn fetish thing. So, (sarcastically) WILD as I am, I haven't yet tried it out.
Will keep you posted as I learn more about this whole new world. It's such a learning curve, but one which is so totally exciting to a stay-at-home mum who's been out of the office environment for SIX YEARS!
Ok, ok, it's been a long time. But I'm really not into blogging atm. I am pretty confident I'll close this down before too long. But in the meantime, just thought I'd connect with you loyal readers out there and show you this project that I've been working on since May last year.
It started with an email I sent out to old high school buddies from O'Connor Catholic High School, Armidale NSW. They began replying in a fashion that - as a scrapper - I could not ignore - I HAD to scrap it! It's an update on our lives aka May 2008. Enjoy.


Copies will be available to purchase from http://www.scrapbookpictures,com/ or I am also attempting to do my first online photobook at http://www.snapfish.com.au/ and I'll give you ahoy when I've completed the upload process and they become available. Love you guys to bits.


The rest I have to offer are going to be published in either Scrapbook Creations or Scrapbooking Memories magazines in the coming months.
It started with an email I sent out to old high school buddies from O'Connor Catholic High School, Armidale NSW. They began replying in a fashion that - as a scrapper - I could not ignore - I HAD to scrap it! It's an update on our lives aka May 2008. Enjoy.


Copies will be available to purchase from http://www.scrapbookpictures,com/ or I am also attempting to do my first online photobook at http://www.snapfish.com.au/ and I'll give you ahoy when I've completed the upload process and they become available. Love you guys to bits.
I also have some of these to share - completely random. The 365days project is taking it's toll atm and really sapping any creativity that might spring up in these cold blizzardy months. Sigh!


The rest I have to offer are going to be published in either Scrapbook Creations or Scrapbooking Memories magazines in the coming months.
Time for a Digital SLR Camera!
I'd like to graduate from a digital point n shoot to a dinky-di digital SLR camera.
I remember very vividly the day I got my first digital camera, in July 2005. It opened up a whole new world of possibilities and added new meaning to chronological order. No longer did I have to write down descriptions of the subject's dress or my baby's expression in my diary, in the vain hope I'd be able to decipher which film photo was taken on what day.
The instant gratification of seeing how my photos had turned out on the viewfinder was a very powerful emotion indeed.
There have been a few drawbacks too - I seem to have forgotten to print out any photos since October 2006.
I tried madly to keep printing and posting in photo albums that are neatly stacked in chronological order on my bookcase. But then I printed out more than a thousand pics one day (uploaded them all throughout the night) and realised that they were all just of the month of May. So instead of having one or two 300-pic albums per year, I needed three albums per month.
Huh?
It was a particularly lucky day when I lost my first digital baby - it drowned in the new pool. In fact, it Christened it, if you like, for none of us had been in it yet. I had my two toddlers sitting by the edge, me in between, and was madly taking scrapping shots of them about to swim for the first time. All of a sudden, Master 3 jumps in while I'm turned shooting Master 2.
The petrifying silence of those several seconds still chills me.
I saw his face under the water, looking quizically at me, unable to comprehend why he can't breathe all of a sudden. First Second .... I try flicking the camera strap off my wrist so I can reach in and grab him. Second Two ... Camera's unco-operative, so I reach in anyway and pull my son to safety. Second Three ... Shit! What about Master 2? Is he still sitting on the edge, safely? Second Four ... yes. THANK-BLOODY-GOD!
But since then, I've never really come to terms with my digital camera loss. But it sure beats the alternative, wouldn't you say???
Anyhow, what with my Photoshop passion exploding onto the scene this past year, and a whole 'nother world of scrappy/photo goodness to explore, I am contemplating returning to the days of the old SLR. I've got two very expensive ones sitting in the cupboard. Film but. One day I'll try selling them on ebay. Perhaps. They're likely to become antiques before that day arrives though.
So, I'm after a camera which gives GREAT depth of field (I realise I'm in the hunt for a twin lens kit), has a viewfinder, and it easy to operate. Got any suggestions?
Let me know. In the meantime, here is some scrappy stuff I've been doing, amid the terrible catch-up I'm calling my 365 project. Can't show you pics of that - it's akin to keeping a diary!


Thanks for Looking!
I'd like to graduate from a digital point n shoot to a dinky-di digital SLR camera.
I remember very vividly the day I got my first digital camera, in July 2005. It opened up a whole new world of possibilities and added new meaning to chronological order. No longer did I have to write down descriptions of the subject's dress or my baby's expression in my diary, in the vain hope I'd be able to decipher which film photo was taken on what day.
The instant gratification of seeing how my photos had turned out on the viewfinder was a very powerful emotion indeed.
There have been a few drawbacks too - I seem to have forgotten to print out any photos since October 2006.
I tried madly to keep printing and posting in photo albums that are neatly stacked in chronological order on my bookcase. But then I printed out more than a thousand pics one day (uploaded them all throughout the night) and realised that they were all just of the month of May. So instead of having one or two 300-pic albums per year, I needed three albums per month.
Huh?
It was a particularly lucky day when I lost my first digital baby - it drowned in the new pool. In fact, it Christened it, if you like, for none of us had been in it yet. I had my two toddlers sitting by the edge, me in between, and was madly taking scrapping shots of them about to swim for the first time. All of a sudden, Master 3 jumps in while I'm turned shooting Master 2.
The petrifying silence of those several seconds still chills me.
I saw his face under the water, looking quizically at me, unable to comprehend why he can't breathe all of a sudden. First Second .... I try flicking the camera strap off my wrist so I can reach in and grab him. Second Two ... Camera's unco-operative, so I reach in anyway and pull my son to safety. Second Three ... Shit! What about Master 2? Is he still sitting on the edge, safely? Second Four ... yes. THANK-BLOODY-GOD!
But since then, I've never really come to terms with my digital camera loss. But it sure beats the alternative, wouldn't you say???
Anyhow, what with my Photoshop passion exploding onto the scene this past year, and a whole 'nother world of scrappy/photo goodness to explore, I am contemplating returning to the days of the old SLR. I've got two very expensive ones sitting in the cupboard. Film but. One day I'll try selling them on ebay. Perhaps. They're likely to become antiques before that day arrives though.
So, I'm after a camera which gives GREAT depth of field (I realise I'm in the hunt for a twin lens kit), has a viewfinder, and it easy to operate. Got any suggestions?
Let me know. In the meantime, here is some scrappy stuff I've been doing, amid the terrible catch-up I'm calling my 365 project. Can't show you pics of that - it's akin to keeping a diary!
Thanks for Looking!
Mr Mojo?
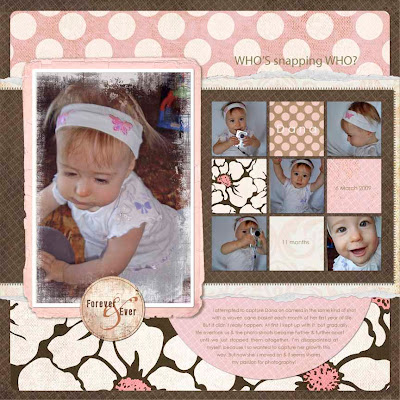
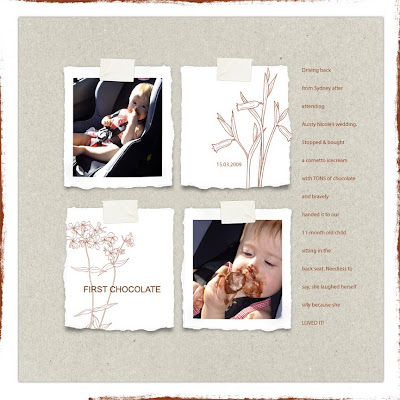
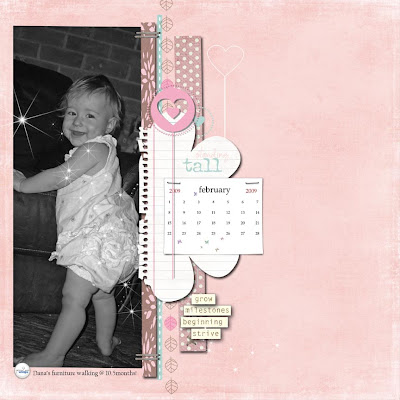
 Shiner is being published in Scrapbook Creations in a few months' time.
In a terrible cycle of lethargy of late. Mr Mojo has left the building. May have something to do with my 365 Project.
I keep on making up pages to go in this book dedicated to recording each day of 2009 in our family, and somehow, I KEEP STUFFING UP and losing it somewhere inside the computer. It's all gone. The pages are no where to be found. Nothing.
So I am getting a bit disheartened. It's happened A LOT! And so I'm up to the third month of the year, and I have started writing my journalling in a WORD document, because really, WORD is the only safe software on my computer. I hope.
My EHD crashed. I got advice from a computer technician to "bang it". I did. Now the light doesn't even come on! Luckily, I had backed up all my photos onto the newer computer (I had been saving them directly onto the EHD and I've since been told that this is ... "silly". (Well, the words were a bit stronger than that.) So, at least it's not all bad.
But my Photoshop cataloging and my ACDSee cataloging are taking it pretty hard. I can't find any supplies when I need them. I can't locate photos when I need them. I might as well be outside pretending to garden instead!
Also, we got a new dog. Saved her from the pound. She's a glorious 3yo Border Collie. But man, since she's joined the family, our canary "Tinkerbell" has had his cage torn open and he is now listed as missing; our rabbit Fluffy escaped, but has since been recaught (by a very nimble and quick ME!) because the dog learned how to open his hutch door (lever); and my new bantam chooks have been "sightseeing" via the jaws of my new dog. Not good. The new dog learned how to pull back the wire on the chook cage, poke her paw in, and lie in wait ... Very tumultuous week. But all animals are unharmed, apart from Tinkerbell, who is still missing. Sigh. I miss Tinkerbell. So happy to get Fluffy back again though! And the new dog, Luci, is still a stunning, lovely, beautiful dog. Just extrememly smarter than what I bargained for!
So, here are a few meagre offerings ....
Shiner is being published in Scrapbook Creations in a few months' time.


And here are a couple of layouts produced from a sketch request from Scrapbooking Memories magazine:
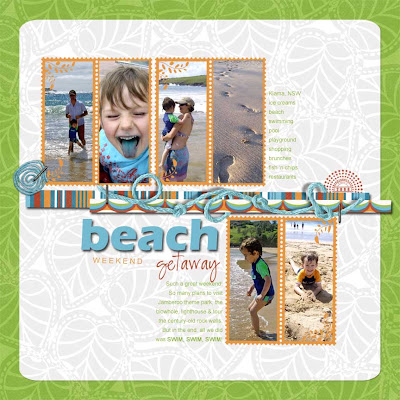
Beach Weekend Getaway
(By Katharyn Brine)
Materials List:
Software: Adobe Photoshop Elements 6. Digital Paper: Michelle Martin “Kiana” patterned papers. Other: Lindsay Jane Design postage frame (recoloured), Katie Pertiet yarn swirl (recoloured) & staple, Mindy Terasawa “dot dot date” stamp. Fonts: Eras Bold ITC (title), Arial and CK Ali Offical.
Details of Approach to Layout:
My inspiration for this layout came from a bunch of bright new digital papers I wanted to use, rather than a set of photos or a story I was compelled to tell. I don’t normally approach a page like this, but every once in a while it feels good to simply “play” at crafting – the fact that I’m still recording memories and moments is a bonus!
Straight away I knew I wanted to use cuts of ribbon or patterned paper across the middle of the sketch. When I came across my yarn in my digital stash, I decided it would tweak the page up a little – especially if I could “weave” it around the other bits of patterned paper.
My background papers needed to be light enough to easily read my intended journalling, because I planned to write straight onto the paper rather than use a tag or label. I also wanted to put into action a new technique I had discovered to round the corners of digital paper. (Much harder than it sounds, compared to simply pulling out a punch with traditional scrapping L!) I love using white backgrounds, especially with multiple photos. The green was a bit out of my comfort zone but that’s what it’s all about – giving myself permission to play!
Next, I searched through my photos looking for a series of happy shots – these beach ones were perfect. And I loved that some of them included colours I had featured on my page already – turquoise & red. The colours, theme and sketch were all coming together nicely. Don’t you love it when that happens!
I searched for frames that I hadn’t used yet, and came across these postage ones that included a little leaf motif in the corners – just like my background paper! I copied several of these and set them out on the page according to the sketch. I’m an asymmetrical girl, so I shuffled a few more up the top as well.
I like to use the “rule-of-thirds” whenever I can, so I try to avoid placing any prominent photos or journalling smack bang in the middle of a page. When it came time to apply my elements, I stuck to this rule too, making sure to arrange them in a triangle formation across the layout.
I had to “flip” a couple of the photos so the subject was facing “into” the page – just make sure there is no text in the photos if you do this, because it will turn out mirrored! I lightened up a few of the shots here as well, so all six looked relatively even when viewed together.
The title came next. I racked my brain for a catchy single-word title but my wit escaped me this time! So I did the next best thing – highlighted one word in my title, and mixed up the fonts and sizing of the rest, so the whole thing became a feature itself. I think they call this typography. Cool.
I typed whatever memories came into my head for the journalling. Again, I made the columns asymmetrical, moving them until they fitted into their spaces quite nicely. I notice now that the top one resembles the long, skinny photographs, and the lower one is short and stumpy like the photo block.
Lastly, I worked on all of my drop-shadows to give the page and elements some dimension. I used the eraser tool to “weave” the yarn around the coloured paper pieces. I “attached” them with staples. I gave the title a shadow to resemble American Crafts foam thickers. Then I saved it as a high-resolution jpeg file, and then as a low-resolution one to upload later on, and called it done.
Three Tips / Techniques
1. Make sure photo subjects are not looking “out” of the page. It disrupts the viewer’s flow and creates an imbalanced page.
2. Experiment with colours you wouldn’t normally use. Dare to be adventurous!
3. Don’t lock yourself into scrapping to a “formula” - where you feel photos are the only way to start a page. Try using patterned paper, colour themes, typography design, or a sketch as your initial inspiration.
Weekdays Without You
Katharyn Brine, NSW
Materials:
Software: Adobe Photoshop Elements 6. Digital Paper: Katie Pertiet “Bit of Grunge No.3”, Lynn Grieveson “Worn Strips”. Letters: Katie Pertiet Red “Chipboard Chunky Alphas” Other: Katie Pertiet Little Round Tabs, staple & Photo Cluster No 11. Fonts: Myriad Pro & PeaCammi-pea.
Approach:
This was a story begging to be told. My eldest son had just started big school and I was apprehensive about how his little brother would cope without his best friend around. The urge to record it became even more compelling when he reacted differently to this change than what I had expected.
Straight away I knew I wanted to use cuts of ribbon or patterned paper across the middle of the sketch. After digging through my digital stash I found these strips of patterned paper with stitching and torn ends – perfect for the texture I wanted to create with this layout. I had to stretch and resize them a bit to fit across the page, and I staggered their ends. I stuck with bright primary colours because I planned to use black and white photos anyway.
I didn’t have any specific photos I wanted to use, so the next best thing was to find photos picturing the two of them together at various stages of their lives, with a main focal photo of Riley. They have played together, living in each other’s pockets, for the past five years so finding group shots of them was no problem.
I’m into circles at the moment, so I adapted the sketch a bit to include a cluster of circle frames. I recoloured the photos to black and white, increased the contrast a bit and individually “clipped” (control-G) them into each frame.
This is a non-destructive way of cropping the photos, and it allows me to move the photo around within the frame until I’ve got it the way that I want. I also try to set the subjects slightly off to one side within the frame and I always make sure no one is looking out “off” the page. This helps create balance.
My background paper needed to be light enough to easily read a big block of journalling, because I planned to write straight onto the paper rather than use a tag or label. After trying a few different background papers, all of which were too busy they clashed with the journalling, I chose a textured white. I love using white backgrounds, especially with multiple photos.
I wrote phrases around the edge of the frames that I had heard Riley say while waiting for his brother to return home. I chose a messy handwriting font and just kept writing until I’d filled the text path. I recoloured the writing that overlapped the papers so it could be read easier.
Next, I settled in to get this story off my chest. I wrote straight into a square text box above the photos, as planned in the sketch. Because I had a lot of details I ended up extending the text box to accommodate this. Sometimes I simply write until I fill up the space in the plan, but in this case, the focus was the story - not how the page looked - so I prioritised accordingly. I chose a plain easy-to-read font because there is nothing worse than trying to decipher large amounts of fancy text.
I like my titles to emphasise the keyword, so out came the (resized) bright red digital chipboard lettering. I finished the titling text in the same straight-forward font as the journalling, and recoloured both to create a green visual triangle between the top patterned paper strip, the title and the journalling block.
The layout needed a date, and because the photos were obviously from all different years, I went with the date of the journalling. I usually stick to the dates of the photos. I picked a tab out of my stash and placed it all around the layout before settling on this spot. Who knows why?! I guess in the end it just helped create a second visual triangle of blue colours, but this was by no means my intention – it was just a bonus!
Lastly, I worked on all of my drop-shadows to give the page and elements some dimension. Then I saved it as a high-resolution jpeg file, and then as a low-resolution one to upload or email later on, and called it done.
Three Tips / Techniques:
1. Stick to plain fonts when journalling large amounts of text. It makes it much easier to read.
2. Become aware of where your elements are on the page, and how they usually look best when placed in a visual triangle of the same colour.
3. Sometimes less is more – especially when using multiple photos or bright colours.
Thanks guys!
Kathy
Layered Templates & Grid Sketches
When I'm being a lazy scrapper & just want to get the story down and find an appropriate picture, I find grid sketches work best. Working to a design formula.
Not that I'm a sketch user. I find them too limiting and uninspiring. But I'm all for sapping someone else's creative energy when mine is running low.
My biggest hurdle when sitting down to create a page is not the journalling (just make that up as I go along, as if I'm talking to my great, great, great grandchildren), nor the imperfect photos, nor the obsessive need to get each date spot on. No, it's the damn way I bunch everything onto the page and attempt to make it look cohesive, interesting, and not too daunting for an unsuspecting visitor to peruse.
Sometimes it all comes together smoothly. Sometimes it does not!
Since discovering digital scrapping, this problem has been virtually solved (and yes, I did mean the pun!). In the digi world, they use page sketches or maps, but they call them "Layered Templates". And they are wonderful!
It is basically having someone else cut out all your paper into pieces that fit together on the page nicely, in a pre-designed layout of your choosing. You still get to pick all your (digital) papers and photos. And "pin" them onto their design. (Using the fantastically quick Ctrl-G shortkey command).
So, it's like cheating. But in a legal way. And at first I was not sure I liked using other people's designs. But hell, some of them had done exactly what I'd just spent 5 hours trying to do, and they'd done it better. With drop shadows! So, why waste the time laboriously placing everything on the page yourself, when you can use a Layered Template?
I used to dog-tag the corners of my scrappy magazines when I saw a design I liked. If I was keen enough, I'd then try and use the page as a sketch. But my idea of proportion sucks. So that's why I jumped for joy when I found out Ali Edwards (scrapping Goddess) was selling her page designs as templates - Whoopee! I had tried before to scraplift her page designs, to varying degrees!
Here are some pages from Ali's books "A Designer's Eye for Scrapbooking with Patterned Paper" and "A Designer's Eye for Scrapbooking" (which I got for a steal through http://www.amazon.com.au/ when the Aussie dollar was good.)

 The digital layered template:

Ali's Design:

My traditional scrapping attempts are still sitting in the WIP pile, unfinished! Here are some digital LOs using the same sketch.


Ali's Design:


Another, that I can't lay my hands on, but I know it was inspired by one of Ali's LOs. I've done a couple of paper LOs using versions this design.
 And the digital template that came much later ...


The official templates available from http://www.designerdigitals.com/
You can also use the templates to do traditional paper scrapping if that's your thing. I find it quickens things up a bit if you don't need to worry too much about the design of the page. Another thing to do, as I started off this blog with, is to use a grid. Simple. It looks neat, it is aesthetically pleasing to the eye, and it's timeless (so you won't cringe at the page 5 years down the track!).


Sorry about the dodgy scans of my old paper layouts!
When I'm being a lazy scrapper & just want to get the story down and find an appropriate picture, I find grid sketches work best. Working to a design formula.
Not that I'm a sketch user. I find them too limiting and uninspiring. But I'm all for sapping someone else's creative energy when mine is running low.
My biggest hurdle when sitting down to create a page is not the journalling (just make that up as I go along, as if I'm talking to my great, great, great grandchildren), nor the imperfect photos, nor the obsessive need to get each date spot on. No, it's the damn way I bunch everything onto the page and attempt to make it look cohesive, interesting, and not too daunting for an unsuspecting visitor to peruse.
Sometimes it all comes together smoothly. Sometimes it does not!
Since discovering digital scrapping, this problem has been virtually solved (and yes, I did mean the pun!). In the digi world, they use page sketches or maps, but they call them "Layered Templates". And they are wonderful!
It is basically having someone else cut out all your paper into pieces that fit together on the page nicely, in a pre-designed layout of your choosing. You still get to pick all your (digital) papers and photos. And "pin" them onto their design. (Using the fantastically quick Ctrl-G shortkey command).
So, it's like cheating. But in a legal way. And at first I was not sure I liked using other people's designs. But hell, some of them had done exactly what I'd just spent 5 hours trying to do, and they'd done it better. With drop shadows! So, why waste the time laboriously placing everything on the page yourself, when you can use a Layered Template?
I used to dog-tag the corners of my scrappy magazines when I saw a design I liked. If I was keen enough, I'd then try and use the page as a sketch. But my idea of proportion sucks. So that's why I jumped for joy when I found out Ali Edwards (scrapping Goddess) was selling her page designs as templates - Whoopee! I had tried before to scraplift her page designs, to varying degrees!
Here are some pages from Ali's books "A Designer's Eye for Scrapbooking with Patterned Paper" and "A Designer's Eye for Scrapbooking" (which I got for a steal through http://www.amazon.com.au/ when the Aussie dollar was good.)
Ali's design:
My digital version:
The digital layered template:Ali's Design:
My traditional scrapping attempts are still sitting in the WIP pile, unfinished! Here are some digital LOs using the same sketch.
Ali's Design:
One of my traditional paper LO's using the design:
Another, that I can't lay my hands on, but I know it was inspired by one of Ali's LOs. I've done a couple of paper LOs using versions this design.
And the digital template that came much later ... Ali's Design:
Can't find Ali's origianl version of this next design, and they have not yet made it into a template. This is my version of it. I'm sure they'll release it sooner than later.
The official templates available from http://www.designerdigitals.com/
You can also use the templates to do traditional paper scrapping if that's your thing. I find it quickens things up a bit if you don't need to worry too much about the design of the page. Another thing to do, as I started off this blog with, is to use a grid. Simple. It looks neat, it is aesthetically pleasing to the eye, and it's timeless (so you won't cringe at the page 5 years down the track!).
Like these:
Sorry about the dodgy scans of my old paper layouts!
So go on, create some of your own pages using the designs I've highlighted here, or some others that replicate your style. Then make sure to post a link so we can all see them! Or email me a low-resolution version (72res) and I'll publish them for you!
Cheers!
Subscribe to:
Posts (Atom)
LinkWithin




 Posts
Posts


- Follow Us on Twitter!
- "Join Us on Facebook!
- RSS
Contact