Tuesday 26 April 2011 2 comments

Freebie: Tossing out Coupons!

So who wants to go shopping?

I'm back from holidaying at Jindabyne, in the Snowy Mountains, where my family and I went trout fishing for six days. And gee, I feel blessed! We caught 20 fish, smoking and cooking them a few hours after catching them in the evenings.


I became acquainted with Butterscotch Schnapps, and it likes me very much because it gave me no headaches or silliness - just pure gratitude for the gorgeously vivid sunsets and sunrises over the lake.


I had my very first internet cafe experience (what a novelty) because I had a magazine deadline while I was away. How many caramel lattes can one have while trying with all her might to send ONE email to the UK, without success? Hmmm, it was good to then be free of the computer for a while - so much happens when your eyes are open like this, instead of being glued to a monitor, lol!


I got to test out my first aid skills on an 87-year-old man who had fallen from his quad bike and become trapped beneath it. Fair bit of blood, and well, because he was "older" I wasn't sure if his eyes were glazed over like that because he was out of it, or because he was just old. He was shaking quite badly too, which was a bit alarming until he informed us he had Parkinson's Disease, lol. Glad to say he turned out ok, a few skin tears (to the bone) and concussion but relatively well off, considering. I don't know what it was, but the two of us seemed to connect - his eyes were wise and very embarrassed at all the fuss going on around him. He couldn't really talk much, but we shared quite a few knowing smiles as I held his hand and we listened to the various tales of what had happened to him flying around us - they seemed to grow with the excitement, lol. But all he wanted was to get back to his wife June, get back on his bike (which was wrecked). He was desperate not to go back into hospital, where he'd just spent a week. Everyone kept admonishing him for riding the quad bike at his age, but I could tell he wouldn't be swayed - he'll be back on it as soon as it's fixed up. And why not? He was out there, rounding up cattle, giving his work dogs a run, fishing morning and night - living life. So much more enjoyable than being cooped up inside a hospital room waiting to die. I hope I'm a comfortable risk taker at his age.


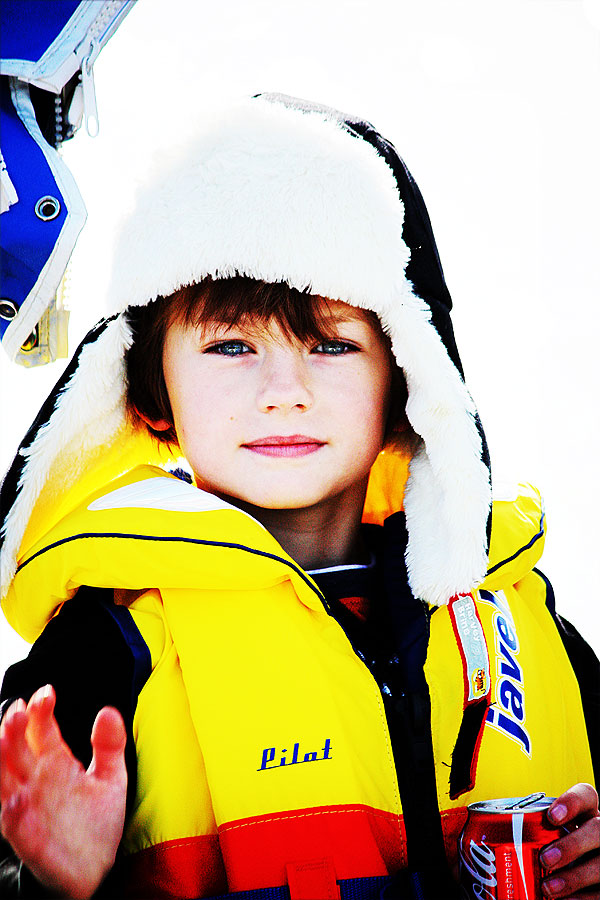
 Dana had her first ride in a boat, and wouldn't stop waddling all around the edges (totally freaking me out). She kept yelling out "faster! faster!". The boys got to pull in a couple of fish too, Riley is so proud to be a fisherman! Harvey was responsible for gutting and cleaning them too (growing up so fast!).

I was responsible for eating them.


And EGGS! I've been a farm girl all my life, and it's been my chore all through childhood and now parenthood, to feed and water the chooks and collect eaggs, which I've NEVER liked to eat. All of a sudden, on this trip, there was a shiny new egg-poaching pan that I HAD to experiment with. OMG. I poached myself six eggs each morning, some for lunch and sometimes even for a quick snack before heading out for night fishing in the evenings. I couldn't get enough and I am now proud to say I like my eggs runny, gooey but not raw. The whites have to be opaque, the yolks liquid. But not so runny they fall through your fork, no. Dexter-style. Now I just have to get all the kids to eat them too. 


Unfortunately, none of these photos go with any of my journalling ... but that happens. All the action pics are on DH's blackberry, which of course I can't have access to to download all the whopping fish photos. But you can use your imagination, hey?

Anyway, today's "freebie" is a 25% discount coupon, to use in my FPD shop. You can use it for anything in my shop there, and the new "Reflection" goodies out tonight are also discounted - so you get a double-discount if you go shopping this weekend.

 Type in smellsfishy? in the coupon box during checkout, and you'll see the discount off your order. Coupon expires April 30.

Have a great weekend!
Friday 15 April 2011 10 comments

Tutorial for Photoshop CS5 Drop Shadows!

Hi everyone! Petra here for Brine Design and I have a tutorial for you today on how to create drop shadows and a 'custom' drop shadow on your pages with Photoshop CS5. If you have another photo editing program maybe you can figure it out if you have these options on your software as well. In any case, I have seen many drop shadow tutorials around but all are for older versions of Photoshop and not for CS5 and CS5 has made our life so much easier!

So here I put 2 papers, a journaling tag (that already comes with its own shadows), a ribbon and a bird. All these items are inside Kathy's gorgeous Hot Cross Fun kit.
In the first picture you can see I haven't used any drop shadows and how flat it looks. So we definitely want to change that! Don't mind the 'design' of my page; I didn't focus on that I just want to show what you can do.


To start, I clicked on the blue paper layer in the layer palette on the right of my software. I right click on the layer and choose Blending Options like in the picture below.


Then in the drop shadow box, you can change the Opacity, distance etc. to your personal preference. Each item is different but in case of background papers I change the values to:
Opacity of the drop shadow to 45%.
Change the angle of how the shadow falls from 120 to 55;
Distance to 10
Spread to 2
Size to 10 pixels and click OK.
Now none of these are set rules! You can change this to anything you personally like!
These are just settings I usually use.


Next up is my ribbon and when you place a ribbon on a flat surface, it will not have an even shadow along the ribbon like Photoshop will do for you when you click the Drop Shadow option so you want to adjust it a little bit to make it look more realistic. You may also want to do this with paper, to slightly warp the paper drop shadow to make it look like a corner of a page is slightly standing up or on a flower etc. Just play with it as you like!

Okay so you create a drop shadow on your ribbon like you did the previous layer only this time I made my shadows Distance 12 pixels, spread 2 pixels and Size 12 pixels to have it stand out a little bit more than the paper shadow.


So when you created the drop shadow for your ribbon layer, then right click on the Drop Shadow Layer you will see attached to the ribbon layer and click on Create Layer!

Photoshop will now create a separate drop shadow layer. Make sure you highlight that new Shadow Layer!

When you sure the Drop Shadow Layer is highlighted, click on Edit -> Transform -> Warp.


You will now see this box pop up around the ribbon with dots in several spots. When you drag one of these dots you will see your shadow starting to move.
Well you don't want to overly move it but also keep in mind in which direction you have all your shadows go because shadows going into different directions looks weird when you look at your end result. So in this case I would imagine the ends of the ribbons would stick up a little bit so I am dragging the shadows on each end a little bit away from the actual ribbon to make it look like the ends are sticking up.


You can see here how I dragged the ends a little bit.


So when you have the drop shadow the way you want, click on the Move Tool to Apply your changes. You then want to make sure you link the ribbon layer AND the shadow layer together so they become one layer again.
You do that by holding down the CTRL-key and click on each layer so they are both highlighted. Then click on the chain link icon so they are linked together.


In the picture below you can see that both layers are now linked by the chain icon behind the layer names.


I have also added a shadow to the bird and made the distance further away on that to make it look like it's flying over the page.
And here is my end result. I hope you can see the difference drop shadows make to your page and that you found this tutorial useful!

Again these rules are not set in stone; it's just one other way to do drop shadows!
Happy scrappin'!

Friday 8 April 2011 0 comments

Gearing up for Easter? Have some Hot Cross Fun!

Hi everyone! Petra here for Brine Design.
I know Kathy lives in Australia so it's now Autumn over there but here in the USA we finally have Spring!! If only the snow and ice would immediately disappear and not come back until the end of the year (or if you're a professional driver like myself you won't mind if it never comes back!). Spring means fresh new leaves, flowers, grass, the clean crisp air and of course the promise of new beginnings.

Brine Design's new kit is called Hot Cross Fun and has those beautiful, vibrant spring colors we all love so much. Because how can you not?
Nothing more fun than to spend time outdoors and live right in between all those colors, which you can see especially around Easter with all the colored eggs and decorations!
So here's your kit to scrap those Easter pictures with or your pictures of the bulbs that just starting to pop up.

Preview Kit:

Preview Elements Only:

Preview Papers Only:


You can buy Hot Cross Fun in a kit, or just the separate element pack, or paper pack. All are available at Funky Playground Designs or Two Little Pixels.

Here are your links for easier shopping (we're all about making things easier for you!!)

FPD:

2LP:


Here's some inspiration from the team.


Check back here soon as Kathy has several new kits lined up that you don't want to miss!!

Monday 4 April 2011 7 comments

Tuesday Tutorial: How to Stickerise Your Title


Today's tutorial is also being published at Funky Playground Designs here.


Digital stickers are a hot item in scrapbooking at the moment, and I’m going to show you a way to make them yourself using word art elements from your digital stash, or text you have written as titling. Stickerising (yes, I made that word up!) is great for giving your older supplies a new lease of life, or for making a title really “pop” on your page by giving it a contrasting background.


All steps are depicted using Adobe Photoshop Elements 6, but your own photo editing software should follow the same basic principles.


Step 1:


Open a new blank file in PSE (I sized mine at 12inch x 12inch, 300dpi and white background).


Find your word art element and drag it onto your PSE workspace. Now drag it onto your blank canvas. This automatically copies your word art so you don’t mess with your original file.


Re-colour your word art now (I re-coloured it pink) or leave it as is for a black and white sticker.


With the word art layer highlighted, Ctrl-Click on the thumbnail in the layers palette. This will bring up “marching ants” around the outline of the word.


Step 2:


Now go to the top menu and press Select > Modify > Expand. Type in 10 pixels. Click ok. The marching ants will now surround your text without touching it. Now Select > Modify > Smooth and type 3 pixels. This will soften the curves around your lettering.


Step 3:


Create a new layer beneath your word art layer (shortcut: hold down Ctrl as you press “new layer” icon in your Layers Palette). Change your workspace foreground colour to grey. Select the paint bucket tool on the left hand menu and click anywhere inside the marching ants shape to fill the area surrounding the text with grey. Repeat Step 2 again if you are creating a three-layered sticker like mine, expanding further from your new grey shape and filling with a contrasting colour (I have used white).


Step 4:


Press Control-D to get rid of the ants. Merge all visible layers (except the original white background layer) from the drop-down menu on the layers palette. If you want to save your sticker for future use on another layout, File > Save As > name it and save as a PNG file. This ensures the transparent background. Saving as a jpeg file will cause your sticker to be permanently “stuck” onto your white background canvas – not a good look! Otherwise, it is now ready to click and drag onto your layout page canvas. Make sure to apply shadows behind it to make it appear more realistic.


Whah-La! Finished!

Credits for main layout: Brine Design LT13, Danielle Young Designs Here's To You kit, Amanda Taylor word art.


If you enjoyed this tutorial, please tell me by writing a comment! For further mini tutorials and freebies, tips and inspiration, visit my blog  often.
Friday 1 April 2011 39 comments

Pirates Not Allowed! {DST Blog Train}

Welcome to my little corner of the world! If you haven't been here before, let me introduce myself. I am Katharyn, founder of Brine Design. I sell digital scrapbooking kits at Funky Playground Designs and Two Little Pixels.

I've only been selling kits since November 2010, but I have BIG plans on the horizon, heehee! I prefer to make and play with kits that have a traditional paper-like style. I usually scrap with my kits myself before I release them onto the unsuspecting public, because I want to know for sure that they are useful!

I scrap to record memories and document the little everyday happenings that go on in my cute little family. I don't ever want to mass-produce layouts or kits - especially if that means sacrificing my own scrapping time. I just enjoy scrapping first and foremost, and I like designing because I like sharing this brilliant craft with people from across the globe!

So here is a small kit I created for the April DST blog train - all about combating the terrible, unscrupulous digital pirates out there who rob me each and every day. Not only do they steal kits for themselves and proclaim them as their own, they also upload to kit-sharing sites and share them with strangers who pay them good money! Unfair? You betcha! Not only is it limiting the number of designers who want to continue designing because they are sick of spotting their designs under somebody else's name, it means more designers are hestitant to offer freebies and samples of their work because these freebies are usually the items that are pirated the most.

Here's my free kit to help out this cause:
Available for free for a limited time.

Now, if you're following the DST blog train, you would have arrived here from  Robyn Pali Designs. Your next stop is  Jen Maddocks Designs . For a full list of blog contributors, check out the DisgiShopTalk forum or my list at the end of this post.

If you'd like to see more of my kits and digital wares, visit my shops at Funky Playground Designs and Two Little Pixels.

Thanks for dropping by, and please take the time to leave a thank you in my comments - I LOVE getting your feedback!


Bloglist:
1. Trish H. Designs
2. KimericKreations
3. Kat's Creations
4. JayaPrem's Hangout
5. Jen C Designs
6. Hot Flash Designs
7. jusme digital
8. MagsGraphics
9. Pixiemama Designs
10. Nibbles Skribbles
11. Sprouting Seeds Studio
12. Studio RA Designs
13. Kate's Digital Designs
14. JW-DigiScraps
15. Delicious Scraps
16. FoxyDesigns
17. *Designer Removed*
18. Misty O'Brien
19. Scrap with AW Design
20. Mikki Designs
21. Psychozoe_Designs
22. ChristinaP
23. Wishing Well Creations
24. CharmCityScraps
25. Digital Creations from Millstream Cottage
26. HunnyBee Design
27. Marie H designs
28. wilma4ever
29. JennCk Designs
30. RebeccaPSP Designs
31. Sweet Tomato Designs
32. Shel Belle Scraps
33. Wyld Web Designs
34. Bonnie Blou Designs
35. Ocean Wide Designs
36. Mandy King
37. Eyeinspire
38. Mommyish
39. Designs by Angel
40. Benthaicreations
41. CC’s digital designs
42. Polka Dot Pixels
43. Alejas Designs
44. Ronda's Scrap Bits
45. Trixie Scraps Designs
46. Designs by Connie Prince
47. Sherwood Studio Designs
48. My 4 Princesses Designs
49. Blue Flower Art
50. Just Creations
51. Digital Harmony Design Studio
52. Digilicious Designs
53. Anelia.net
54. A-liya's dreams
55. Snackpackgu's Designs
56. Angel Hartline Designs
57. Inspired Designs
58. MoonDesigns
59. Jen Reed Designs
60. Willow Grace Designs
61. Steadfast and Immovable
62. t for me designs
63. Aimee Harrison Design Studios
64. Hornbuckle Designs
65. Sugar Kissed Designs
66. Digi Deborah Designs
67. Scraps By Mara
68. BeeHaven Designz
69. MaitriScraps
70. Snips and Snails Designs
71. Word Art World
72. Luv Ewe Designs
73. Ramona Memories
74. DigitalGator Designs
75. Jeanine DeOre Design Studio
76. Girl Boy Girl Designs by Jen Balding
77. Albums to Remember Designs
78. ViolaMoni
79. ColleenLynch
80. Diamond Ink Designs
81. Color With Caryn
82. Circle Of Life Studio
83. Doodling Divas & Wild Roses Doodles
84. Bon Scrapatit Designs
85. Designs By Tracy
86. Brandi White
87. Munchkyn Scraps
88. Nette's NightOwl Works
89. Scrapper's Delights
90. Albina Design
91. Armina Designs
92. Z Pink Boudoir Designs
93. Unforgettable Moments
94. The Brown Owl
95. Four Little Pixels Designs
96. Pardon the Mess
97. Mistica Designs
98. jumbbumble designs
99. Robyn Pali Designs
100. Brine Design
101. Jen Maddocks Designs
102. Design by Anita
103. eqrAveziur graphic and design

LinkWithin

Related Posts with Thumbnails
 
;