Wednesday 27 July 2011 2 comments

Tutorial: Realistic Stamping Across Layers


Credits: Digital Papers – Red Ivy Design; Elements – Red Ivy Design paint splotch, paper flower & leaves, Brine Design hanging frame, date stamp, polka dot stamp, & word strips; Rob & Bob alpha stamp; Font – Smiley Monster; Software – Adobe Photoshop Elements & ACDsee Photo Manager.


*This tutorial is written for beginner digital scrapbookers who use Adobe Photoshop Elements, but the basic principals should work on any photo editing software.

By Katharyn Brine,
Brine Design

One of the reasons I was reluctant to get into digital scrapbooking when I first saw it, was the complete and utter fear my pages would end up looking like it was done on a computer – flat, dimensionless, and just downright wrong if there happened to be anything slightly “bulky” depicted on the page.
What I am aware of now though, is that a) I was looking at really bad pages! b) It all comes down to shadowing and your ability to mimic real-life (and often imperfect) craft situations.
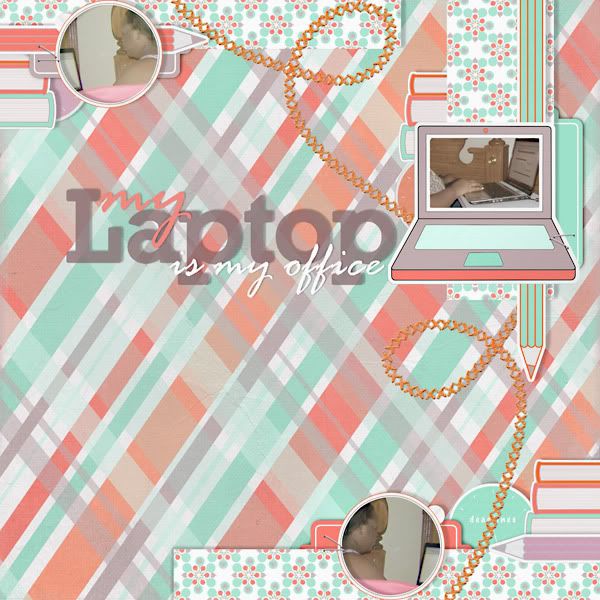
Take stamping, for instance. In paper crafting it’s messy, splotchy, and rarely comes out exactly where you planned it – your titles are always a little bit haphazard – and if you stamp across several layers of papers, there is just no way to escape that clean line between those layers of papers where the paint didn’t quite catch. It’s what gives your page the “homemade” look, which I totally support (I mean, who wants it to look like it was done in a factory?).
There is a way to make your digital pages imitate this effect too. Here’s how ...

Step One:
Open Photoshop Elements, then open all the jpeg (papers) and png (elements) digital supplies you will be using on your page (File > Open > navigate to your supplies folder). Create a new canvas to work on (File > New > Blank File. Set size at Width: 12inches, Height: 12 inches, Resolution: 300 pixels/inch, RGB colour, Background: white). Begin creating your page by double clicking on your papers and dragging them onto your canvas (it should be the last white square in your bin at the bottom of the screen).
For my project, I used a background solid colour, and a strip of patterned paper. To “cut” the strip, I double-clicked on the paper so it was in my main workspace. Then I changed tools to the rectangular marquee tool (top left corner of tools palette). I clicked-and-dragged a rectangle shape of “marching ants” over my paper to the size I wanted to cut out. Then copy (Ctrl-C) the selection (whatever is inside the marching ants). Double-click on your project canvas, click on the top most layer in the layers palette, and “paste” your paper strip over the top (Ctrl-V). Drag the paint element onto your project page. Everything looks very flat and dimensionless so far.


Step Two:
Now select your paper strip layer, Ctrl-click on its thumbnail image in your layers palette, so that marching ants surround your paper strip. With your stamp (or painted element) layer highlighted, click on Layer > New >Layer Via Cut. This cuts and duplicates part of your stamp onto a new layer. Now you need to swap your layers around in the layers palette, so the original stamp layer is below your paper strip layer.


Step 3:
Now you need to move your copied part of the stamp just slightly so it appears offset from the remainder of the stamp on the lower layers. To do this, click on the copied stamp layer in your layers palette, select the Move tool (cross in top left corner) and slightly move your copied stamp to the right and up a bit. You may need to zoom in on your stamp to be more accurate. To do this, select the zoom tool from your palette, or use your scroll wheel on your mouse after setting your preferences to do so (Edit > Preferences > General > check “zoom with scroll wheel”).


Step 4:
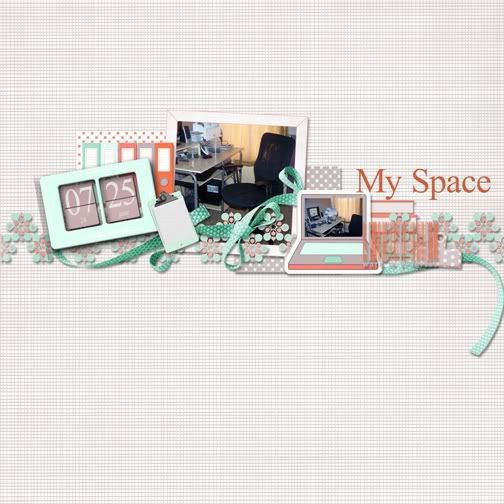
Now you need to add shadows to each layer of paper to make your stamp appear more realistic. But I’d advise you to go on and complete your layout first, before starting shadowing. If you are anything like me, you’ll be tucking things behind and in front of layers and changing it all about until it all looks ok together. When you are done, assess your page and pick out the bulky elements, such as buttons, chipboard, felt and rosettes – these will need to appear further away from your background, than the thinner papers and journalling cards do.
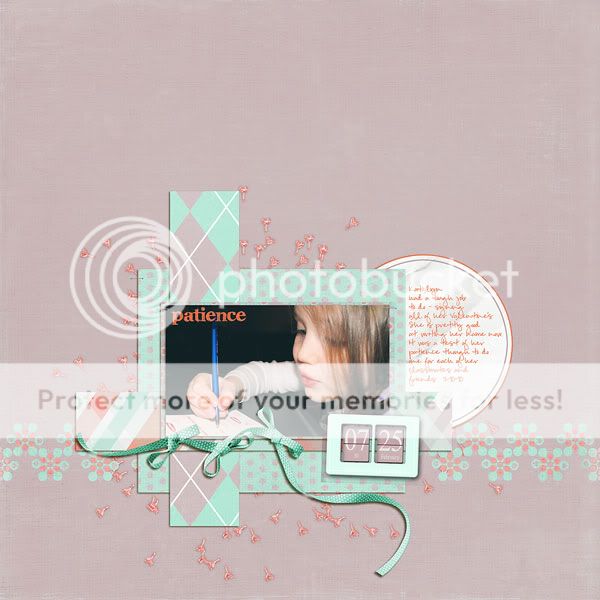
To add shadowing, you can either use Photoshop’s preset drop shadows (go to “Effects” palette above your layers palette; pick the second icon “layer styles”; choose “drop shadows” from the pop-down menu. Then click and drag an appropriate shadow style onto your element on the canvas.
To make a customised shadow layer for each element (which I thoroughly recommend if you have a little bit more time), do this: Ctrl-click on the element layer’s thumbnail. Ctrl-click on the new layer icon (to create a new layer beneath the element layer). Press “d” on your keyboard to change the foreground colour palette to black. Select the paint bucket tool and, with the new empty layer highlighted, “fill” the marching-ants shape of the element with black. You won’t see anything different on your canvas yet. Still in your layers palette, change the opacity of the black shape layer to about 65 per cent. (You can play with this setting later). Alt-D to get rid of the marching ants. Go to top menu and select Filter > Blur > Gaussian Blur and choose an appropriate level of blurriness dependant on how far away you want the elements to appear from your background. I chose 20 pixels for my paper strip custom shadow. Now complete for each element and layer on the page!


When you are finished, don’t forget to save your project as a PSD file (if you want to work on it again later), save as a jpeg file (if you intend on printing it out). Close all your digital supplies without saving any changes you made to them, to keep them in the same condition you bought them in!

For more tips, tutorials, and chatter visit my blog: www.katharynbrine.blogspot.com.
Tuesday 26 July 2011 0 comments

$2 Tuesday at Two Little Pixels

This is one of my most popular selling kits - Cooper - and guess what day it is today? $2 Tuesday at my Two Little Pixels store.

So, why not take advantage of this discount and pick up my ...

Cooper Element Pack

Cooper Paper Pack

But it's discounted to this low price for one day only!

Saturday 23 July 2011 3 comments

Closing Down Sale


Well, it is with a heavy heart that I tell you all that my good ol' Aussie shop, Two Little Pixels, is closing down in two weeks.

I'd like to take this opportunity to thank all of you wonderful fans for buying from me at that store, and to the people behind Two Little Pixels that made it such a success. Yes, it was successful, it's just also very time-consuming to run a shop, and that's the reason it's closing down.

So while we say goodbye to one of my favourite shops, I hope that you will follow me to my other store, Funky Playground Designs.

Everything I sell at Two Little Pixels will be discounted 40 per cent - the biggest discount I've ever applied (and will ever apply!) so if you've been storing up your wish lists in the event of a sale, now is the time!

Many other designers there will also have a large discount, and some are even quitting designing for good, so you will want to check out the goods before they close their doors forever - August 5, 6pm AUSSIE time (GMT +10).

Bye bye Two Little Pixels :(

Tuesday 19 July 2011 0 comments

$2 Tuesday at Two Little Pixels

Kids are back at school today, poor little critters, it's so cold waiting at the bus stop!

Here are my $2 offerings at Two Little Pixels for today only.

Kendi Papers

Kendi Templates

Hope you have a wonderful Tuesday, leave me a comment so I don't get lonely :)
Monday 18 July 2011 1 comments

New Release: Interior Chic

So I've been watching a lot of an Aussie renovation TV show called 'The Block' and am so inspired by interior design at the moment!

This kit is what I would decorate my top-floor city apartment with, if I had one, lol. Think cushions, fabrics, wall prints and wallpaper ... Soooo wish I could decorate somewhere in my house right now. I actually live in the bush and my home doesn't have a white spot in it, thanks to three messy young kidlets!


Here's some creative inspiration ...

Blake

Hybrid tin from Crazymumm

Toadhughes

Me

and because I like this colour scheme so much, I've splashed out on some gorgeous blinkies, do you want to wear one? Thanks to the talented Laura Banasiak.

Fan Blinkie

Tuesday 12 July 2011 1 comments

$2 Tuesday at Two Little Pixels

It's that time again already! The year's going by so quickly, it's scary! Wish Winteer would stop, I was over it by the end of Autumn, lol!

Here's what I'm offering for $2 each today only, at my Two Little Pixels store.

Blake Element Pack

Blake Paper Pack

But remember, it's only on Tuesday - gone tomorrow!

Monday 11 July 2011 0 comments

New Sketch Action Coming Soon!


I've got a new Action set coming into my stores soon! Readers of my column in Scrapbooking Memories Magazine have already read about it and seen what it can do (seeing as the current issue has come out earlier than it's 20 July schedule!)

So readers, consider it a sneaky preview!

I do apologise to those readers who have contacted me looking for this set - and I'll be sure to let you all know when it is available on my shelves. This Sketch Action Set is currently being tested for it's application in additional software - at the moment it's only been tested in Creative Suite 5.

It will be available within days, so sit tight! The discounted price will be available for a week after it's released.

I do hope you enjoyed the article, and have given it a try yourselves! If you haven't recieved your issue of Scrapbooking Memories Magazine yet, I'm sure it's on it's way. And for those of you who are overseas and unable to access it, I'll be posting the article and tutorial here on my blog, two months after magazine publication.


Tuesday 5 July 2011 0 comments

$2 Tuesday at Two Little Pixels

Hiya guys, it's that time of week again where some very special bargains can be found in my store at Two Little Pixels.

Here's what I'm offering up for a meagre $2 today (and it will be around for a lot longer than that half a cup of coffee will be, hahaha!)


Good luck with your scrapping today :)
Sunday 3 July 2011 10 comments

Freebie Kit: Toothless

So, I've got two boys who are running around the house in various stages of toothlessness. A while back, I posted about a hybrid project where I made a tooth fairy collecting can - something to put the teeth in until our fairy makes her way to our part of the world to pick it up. (And yes, she has forgotten to come once or twice. But it was only because she thought the teeth were sooooo special, and she wrote a glittery fairy-dust notelet of apology...)

Anyhoo, you can check out the cans that I made here, using ordinary containers I had lying around the house. Now, if you haven't already made some of these yourself, I'd love to give you a kit to do so! For FREE! Yay.

Think you could use this? If not, you could at least record the occassion when your baby first loses his/her first tooth (and second and third, seeing as they seem to happen in rapid succession after that first one!)


I've attached the download link to my facebook page, seeing as there are more of you guys following me over there. So head on over here and pick it up (click on the pink VIP button on the left of my Facebook Fan Page).

This kit will be available for one week only, before it's replaced with a new freebie! If you missed out on any previous freebies, they are (or will be soon) available in my shops at Two Little Pixels and Funky Playground Designs, cheap as chips!

I'll be back to share some inspirational pages / projects from my Creative Team very, very soon ...!
1 comments

New Release: Home Office Love

Well, I'm a little late getting this post to happen, I've been so busy creating another fan freebie!

It's no surprise that I absolutely love browsing the stationery shelves at the supermarket or office supplies store. I just can't get enough of it - my favourite kind of shopping!

With this kit I hope to inspire you to create a workspace for yourselves that reflects your creative side - be that a home office or your cubicle at work. When you are surrounded by bliss, you're sure to fall in love with your work all over again!

And I for one, just cannot go past a cute rolodex! I think I should start collecting them, lol! Available in the Brine Design shop at Funky Playground Designs, and Two Little Pixels. They are on special for the weekend :)


 My lovely inspiration girls ...

Demetria

Becki

Caroline

Blake

Trish

and some hybrid goodness from Lucy!

Have a great weekend everybody :)

LinkWithin

Related Posts with Thumbnails
 
;