Hi everyone! Petra here for Brine Design and I have a tutorial for you today on how to create drop shadows and a 'custom' drop shadow on your pages with Photoshop CS5. If you have another photo editing program maybe you can figure it out if you have these options on your software as well. In any case, I have seen many drop shadow tutorials around but all are for older versions of Photoshop and not for CS5 and CS5 has made our life so much easier!
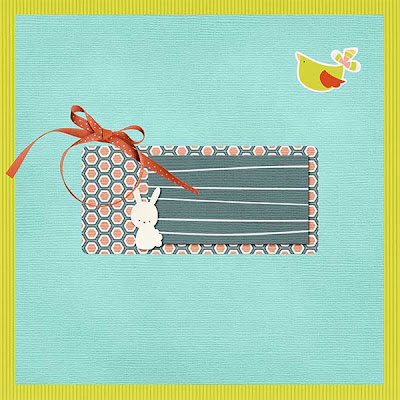
So here I put 2 papers, a journaling tag (that already comes with its own shadows), a ribbon and a bird. All these items are inside Kathy's gorgeous Hot Cross Fun kit.
In the first picture you can see I haven't used any drop shadows and how flat it looks. So we definitely want to change that! Don't mind the 'design' of my page; I didn't focus on that I just want to show what you can do.
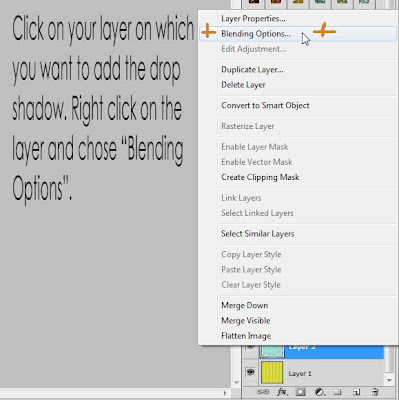
To start, I clicked on the blue paper layer in the layer palette on the right of my software. I right click on the layer and choose Blending Options like in the picture below.
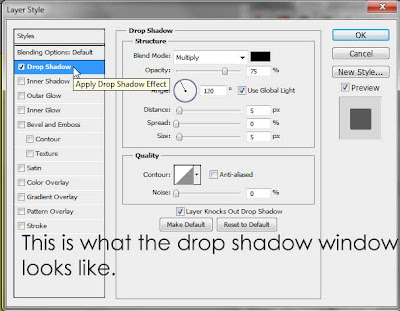
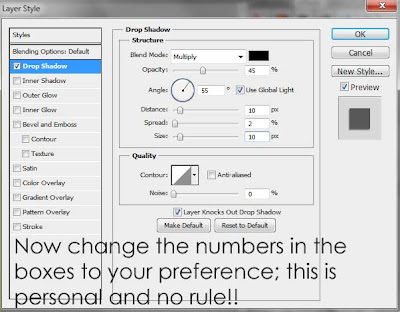
Then in the drop shadow box, you can change the Opacity, distance etc. to your personal preference. Each item is different but in case of background papers I change the values to:
Opacity of the drop shadow to 45%.
Change the angle of how the shadow falls from 120 to 55;
Distance to 10
Spread to 2
Size to 10 pixels and click OK.
Now none of these are set rules! You can change this to anything you personally like!
These are just settings I usually use.
Next up is my ribbon and when you place a ribbon on a flat surface, it will not have an even shadow along the ribbon like Photoshop will do for you when you click the Drop Shadow option so you want to adjust it a little bit to make it look more realistic. You may also want to do this with paper, to slightly warp the paper drop shadow to make it look like a corner of a page is slightly standing up or on a flower etc. Just play with it as you like!
Okay so you create a drop shadow on your ribbon like you did the previous layer only this time I made my shadows Distance 12 pixels, spread 2 pixels and Size 12 pixels to have it stand out a little bit more than the paper shadow.
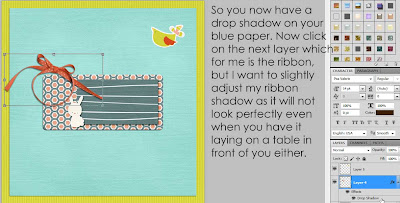
So when you created the drop shadow for your ribbon layer, then right click on the Drop Shadow Layer you will see attached to the ribbon layer and click on Create Layer!
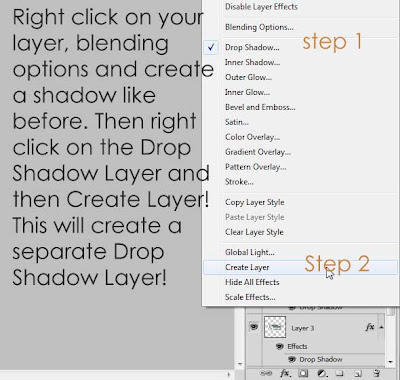
Photoshop will now create a separate drop shadow layer. Make sure you highlight that new Shadow Layer!

When you sure the Drop Shadow Layer is highlighted, click on Edit -> Transform -> Warp.
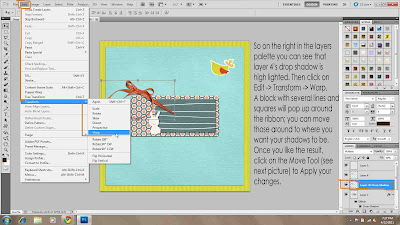
You will now see this box pop up around the ribbon with dots in several spots. When you drag one of these dots you will see your shadow starting to move.
Well you don't want to overly move it but also keep in mind in which direction you have all your shadows go because shadows going into different directions looks weird when you look at your end result. So in this case I would imagine the ends of the ribbons would stick up a little bit so I am dragging the shadows on each end a little bit away from the actual ribbon to make it look like the ends are sticking up.
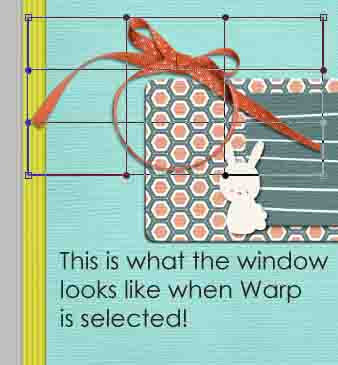
You can see here how I dragged the ends a little bit.
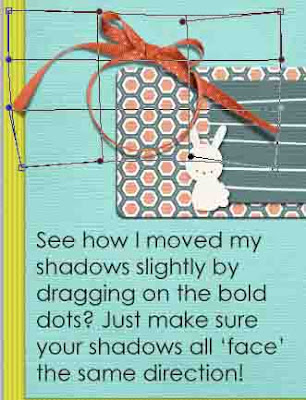
So when you have the drop shadow the way you want, click on the Move Tool to Apply your changes. You then want to make sure you link the ribbon layer AND the shadow layer together so they become one layer again.
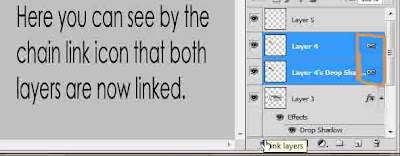
You do that by holding down the CTRL-key and click on each layer so they are both highlighted. Then click on the chain link icon so they are linked together.

In the picture below you can see that both layers are now linked by the chain icon behind the layer names.
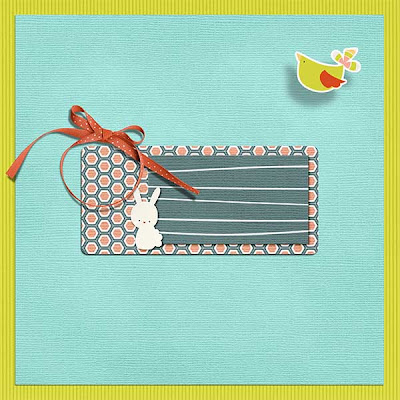
I have also added a shadow to the bird and made the distance further away on that to make it look like it's flying over the page.
And here is my end result. I hope you can see the difference drop shadows make to your page and that you found this tutorial useful!
Again these rules are not set in stone; it's just one other way to do drop shadows!
Happy scrappin'!


10 comments:
Love your tutorials ... can't wait to practise...now I just need to get my hubby off the computer for long enough!
Elizabeth
Just a quick note to let you know that a link to this post will be placed on CraftCrave today [15 Apr 01:00am GMT]. Thanks, Maria
Thank you, Petra for this tutorial. I am just learning CS3, but hope to be able to translate your instructions for use with my program. I can't tell you how much I appreciate tutorials. Very helpful. Thanks again.
You're welcome Libby and Connie! Connie you should be able to use it with CS3; not that much has changed just some things have been made easier and added is all :D
Hi there! Thank you!
Thank you for your tutorial!! I just moved from Gimp to CS5 and this is exactly what I needed. Thank you!
This tutorial is awesome, thanks alot.
Thank you! I just got CS5 so this is so helpful!! :D
thank you it was a better explanation than the one offered by Adobe itself. Cheers
Post a Comment